When I was pregnant (pregnancy recap to come), I knew that I wanted a nursery that I hadn’t really seen before. I wanted it to be cozy. And, I’d thought of doing a Harry Potter-inspired room for a WHILE, especially after following The Linen Rabbit. But, everything I found on Pinterest wasn’t really speaking to me.
So, once we found out we were having a girl (though it wouldn’t have mattered either way), I knew I had to move forward with the idea of a magical nursery for my little lady. Kyle was on board the entire way because we both LOVE HP — we’ve read all the books, watched the movies a million times and we even mini-mooned at HP World in Orlando.
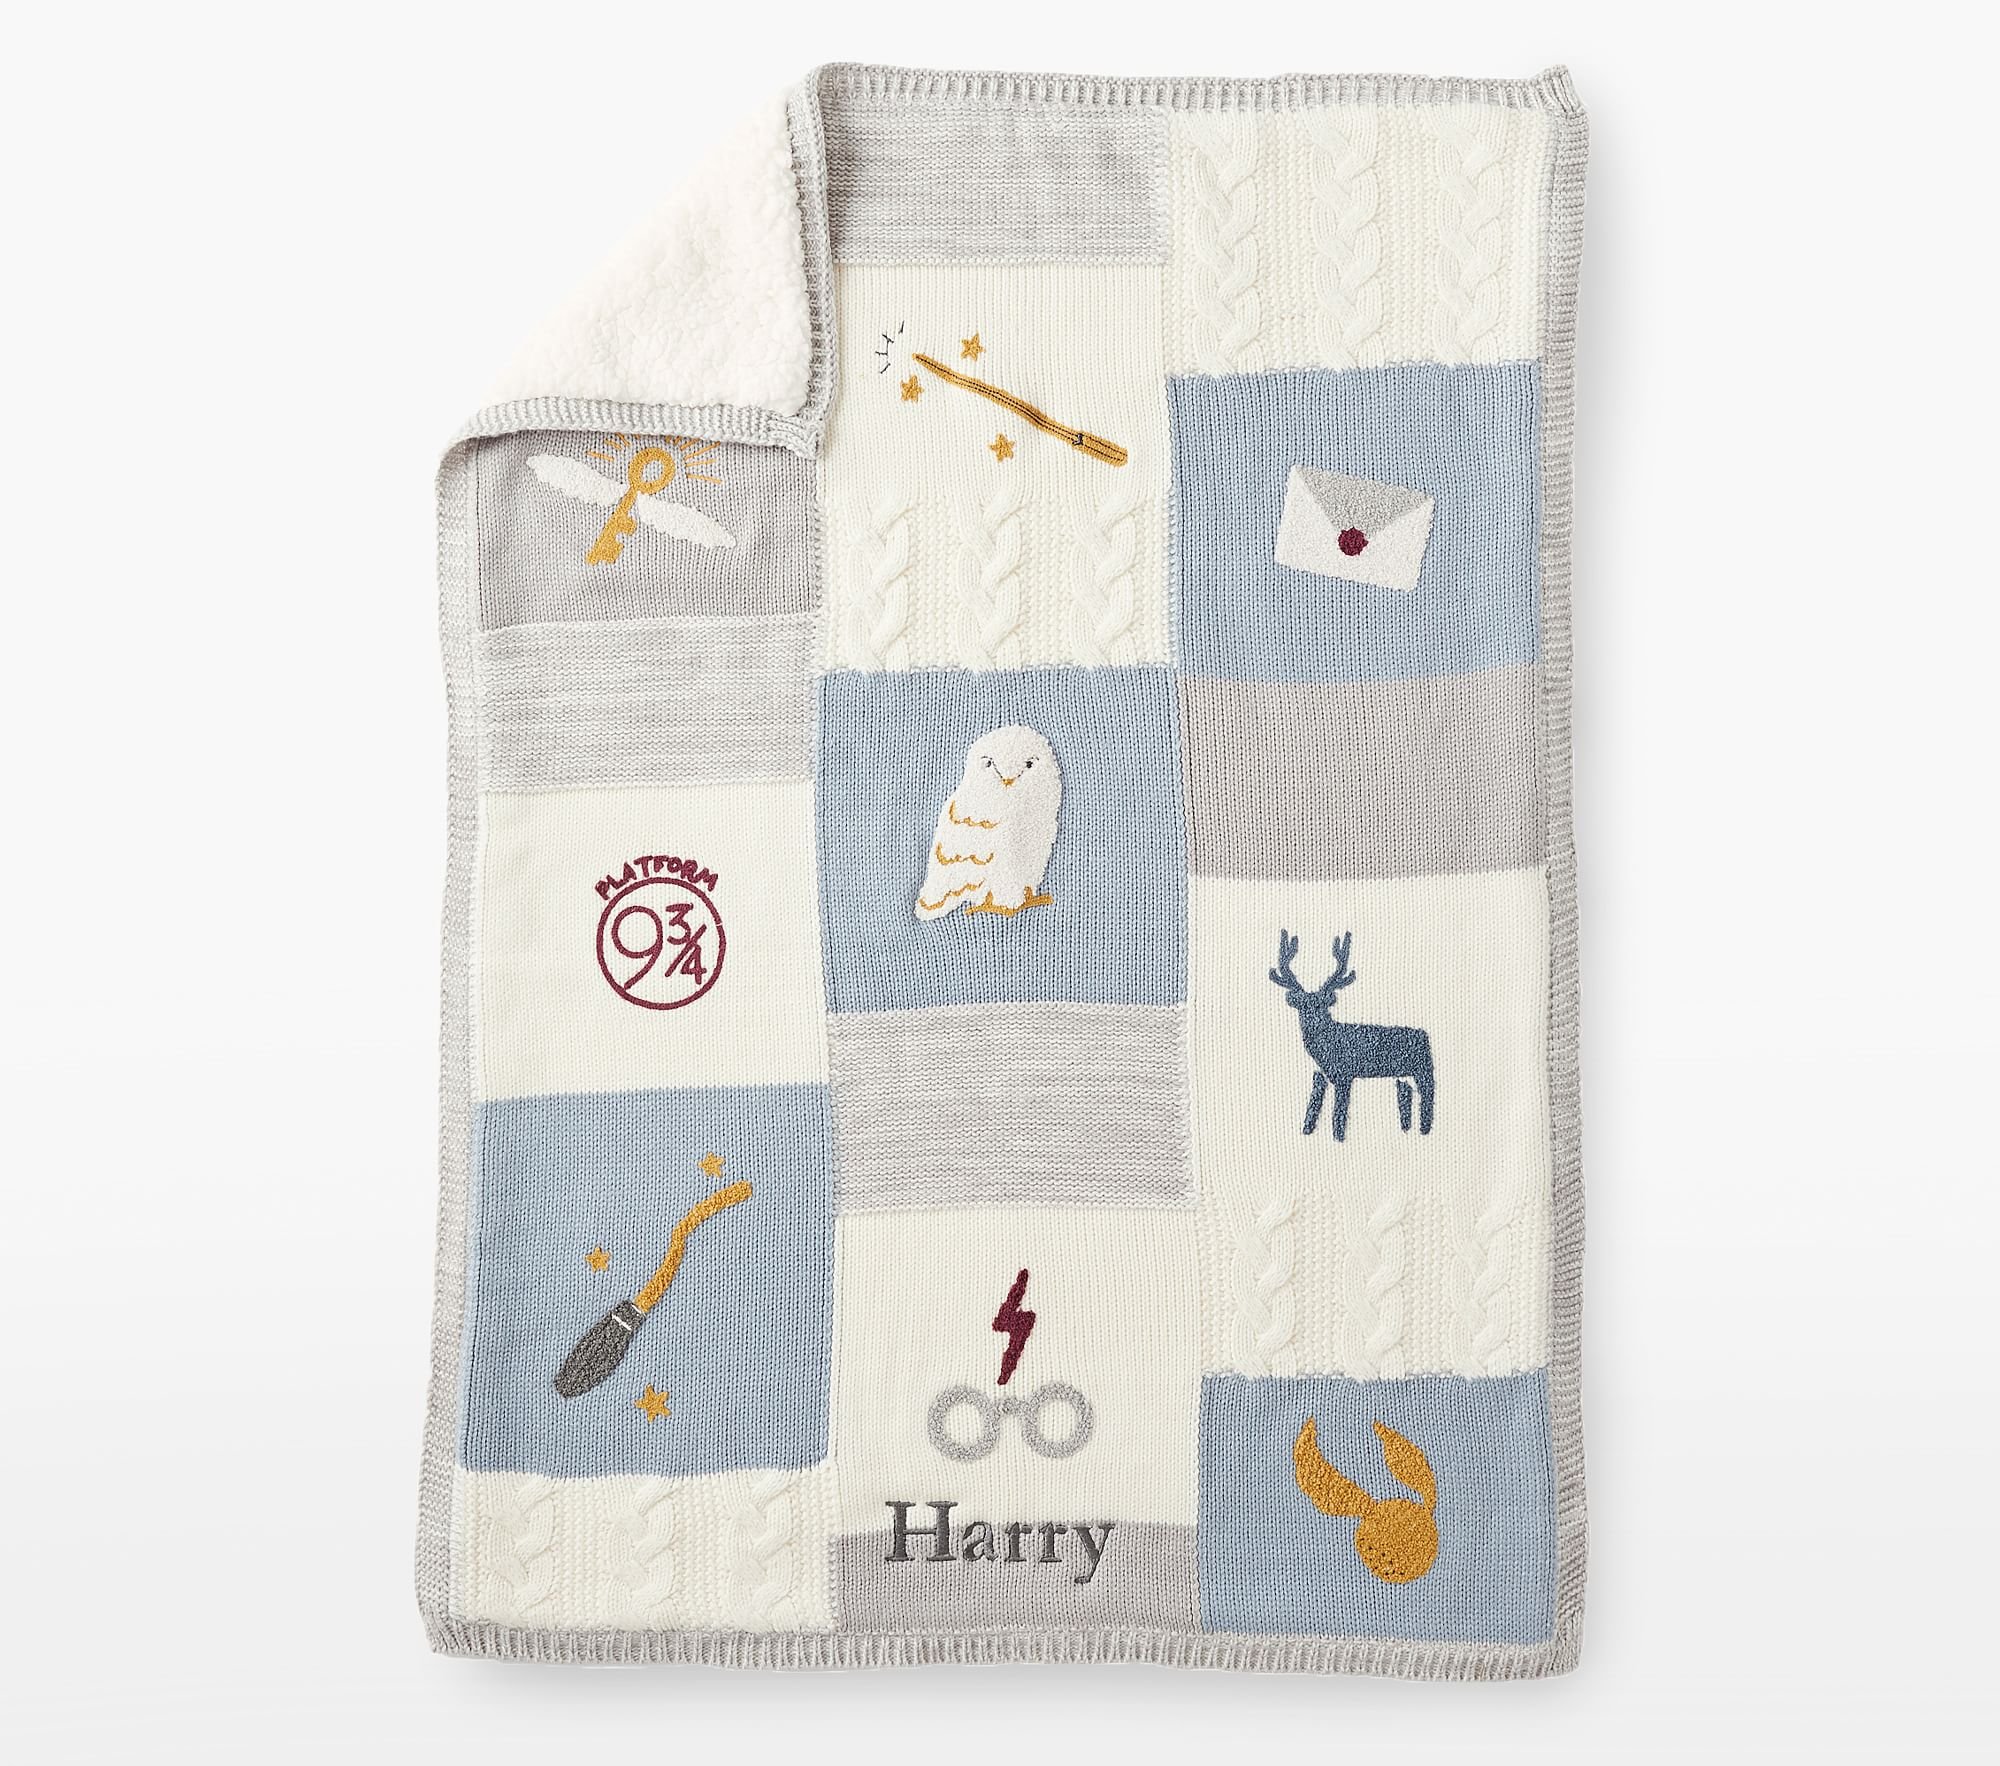
Anyway, I wanted the theme to be subtle and I wanted to keep any licensed materials to a minimum. I didn’t want it to yell HP, I wanted it to whisper. I wanted to look around and see something new each time you entered. Now, to be completely transparent, I’ll probably continue working on this in the months ahead. I have a few other ideas I’d like to incorporate. But, now I have a newborn, so for the sake of getting this blog post published, it’s ready for your eyes.
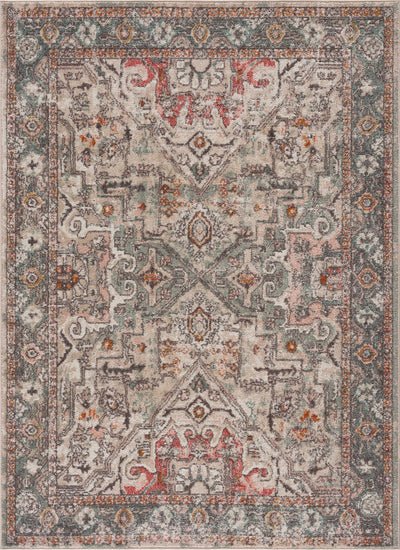
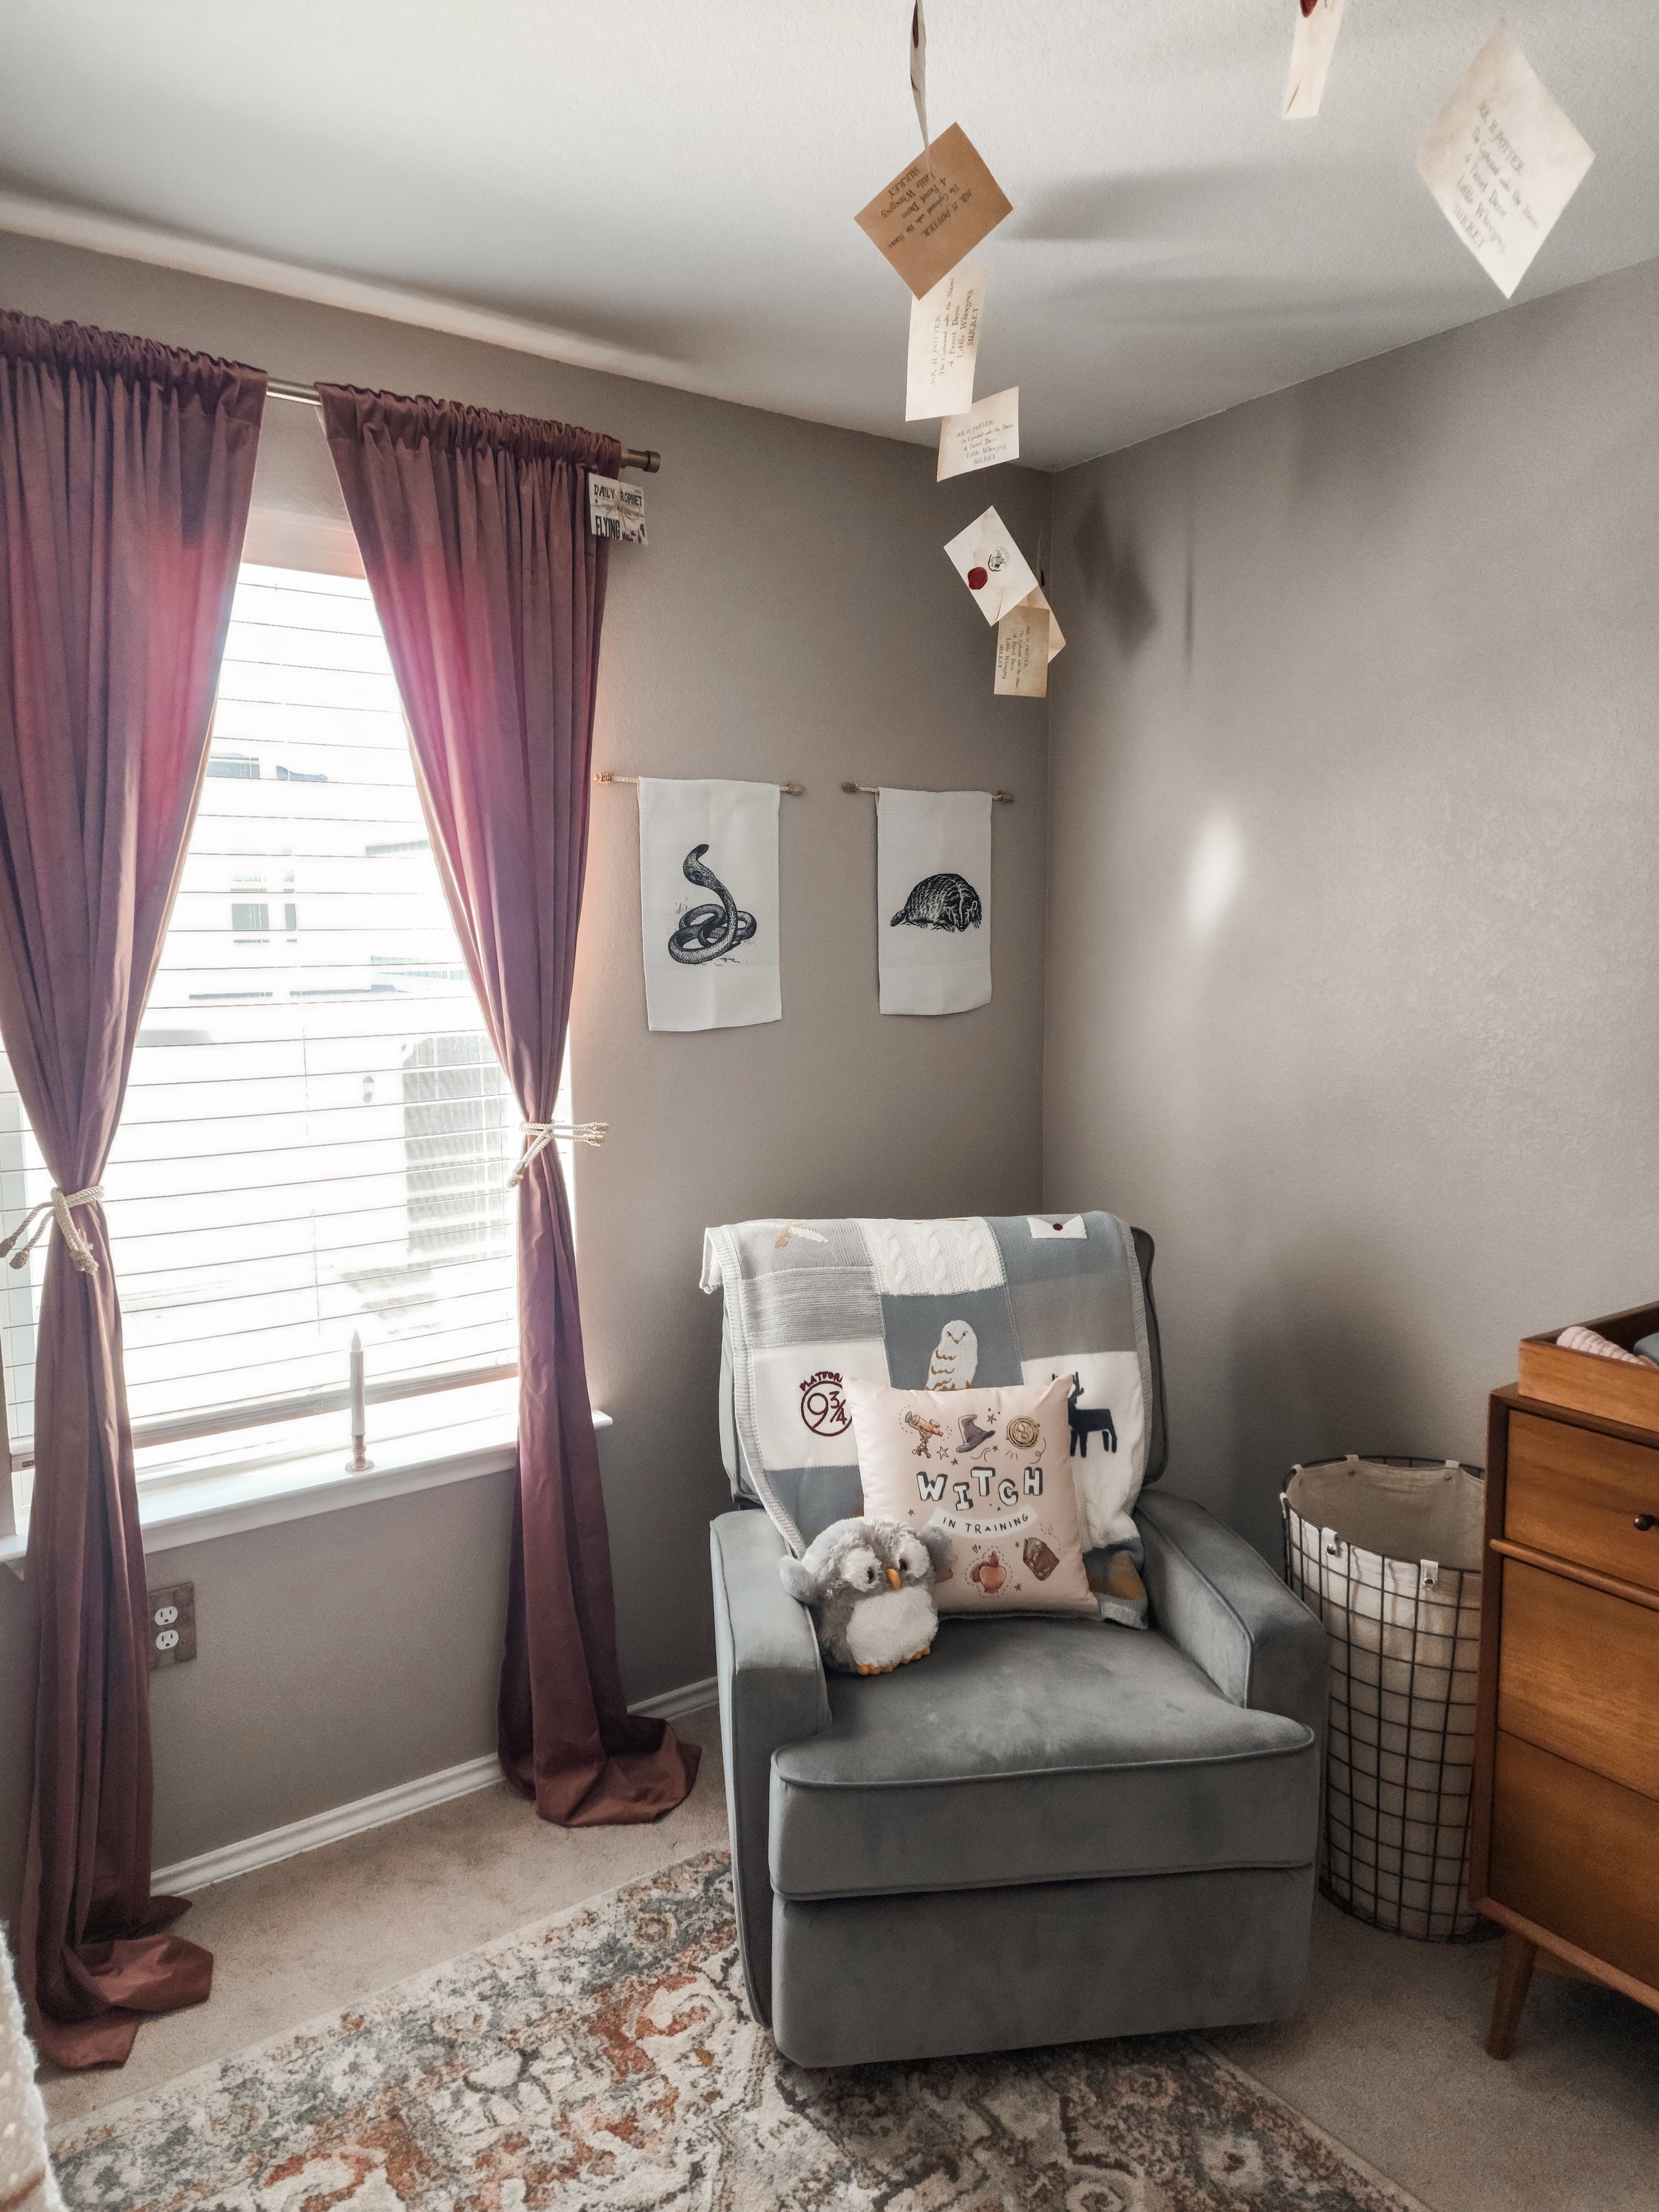
We painted this room probably two-ish years ago. The color is “Nightingale Gray” by Behr. If you’ve been around for a while, you know this room was my office prior to being flipped into a nursery, and I used this rug in my office then too. I always loved the color palette in the rug. So, a lot of the decisions on theme, colors, etc. were based off it.
I’ll give a brief description of how I put the room together and I’ll share affiliate links to shop at the end of the post for everything that I’m able to link. Nothing in this room was sponsored, all paid for by us or gifted by friends & family at our baby shower. :)
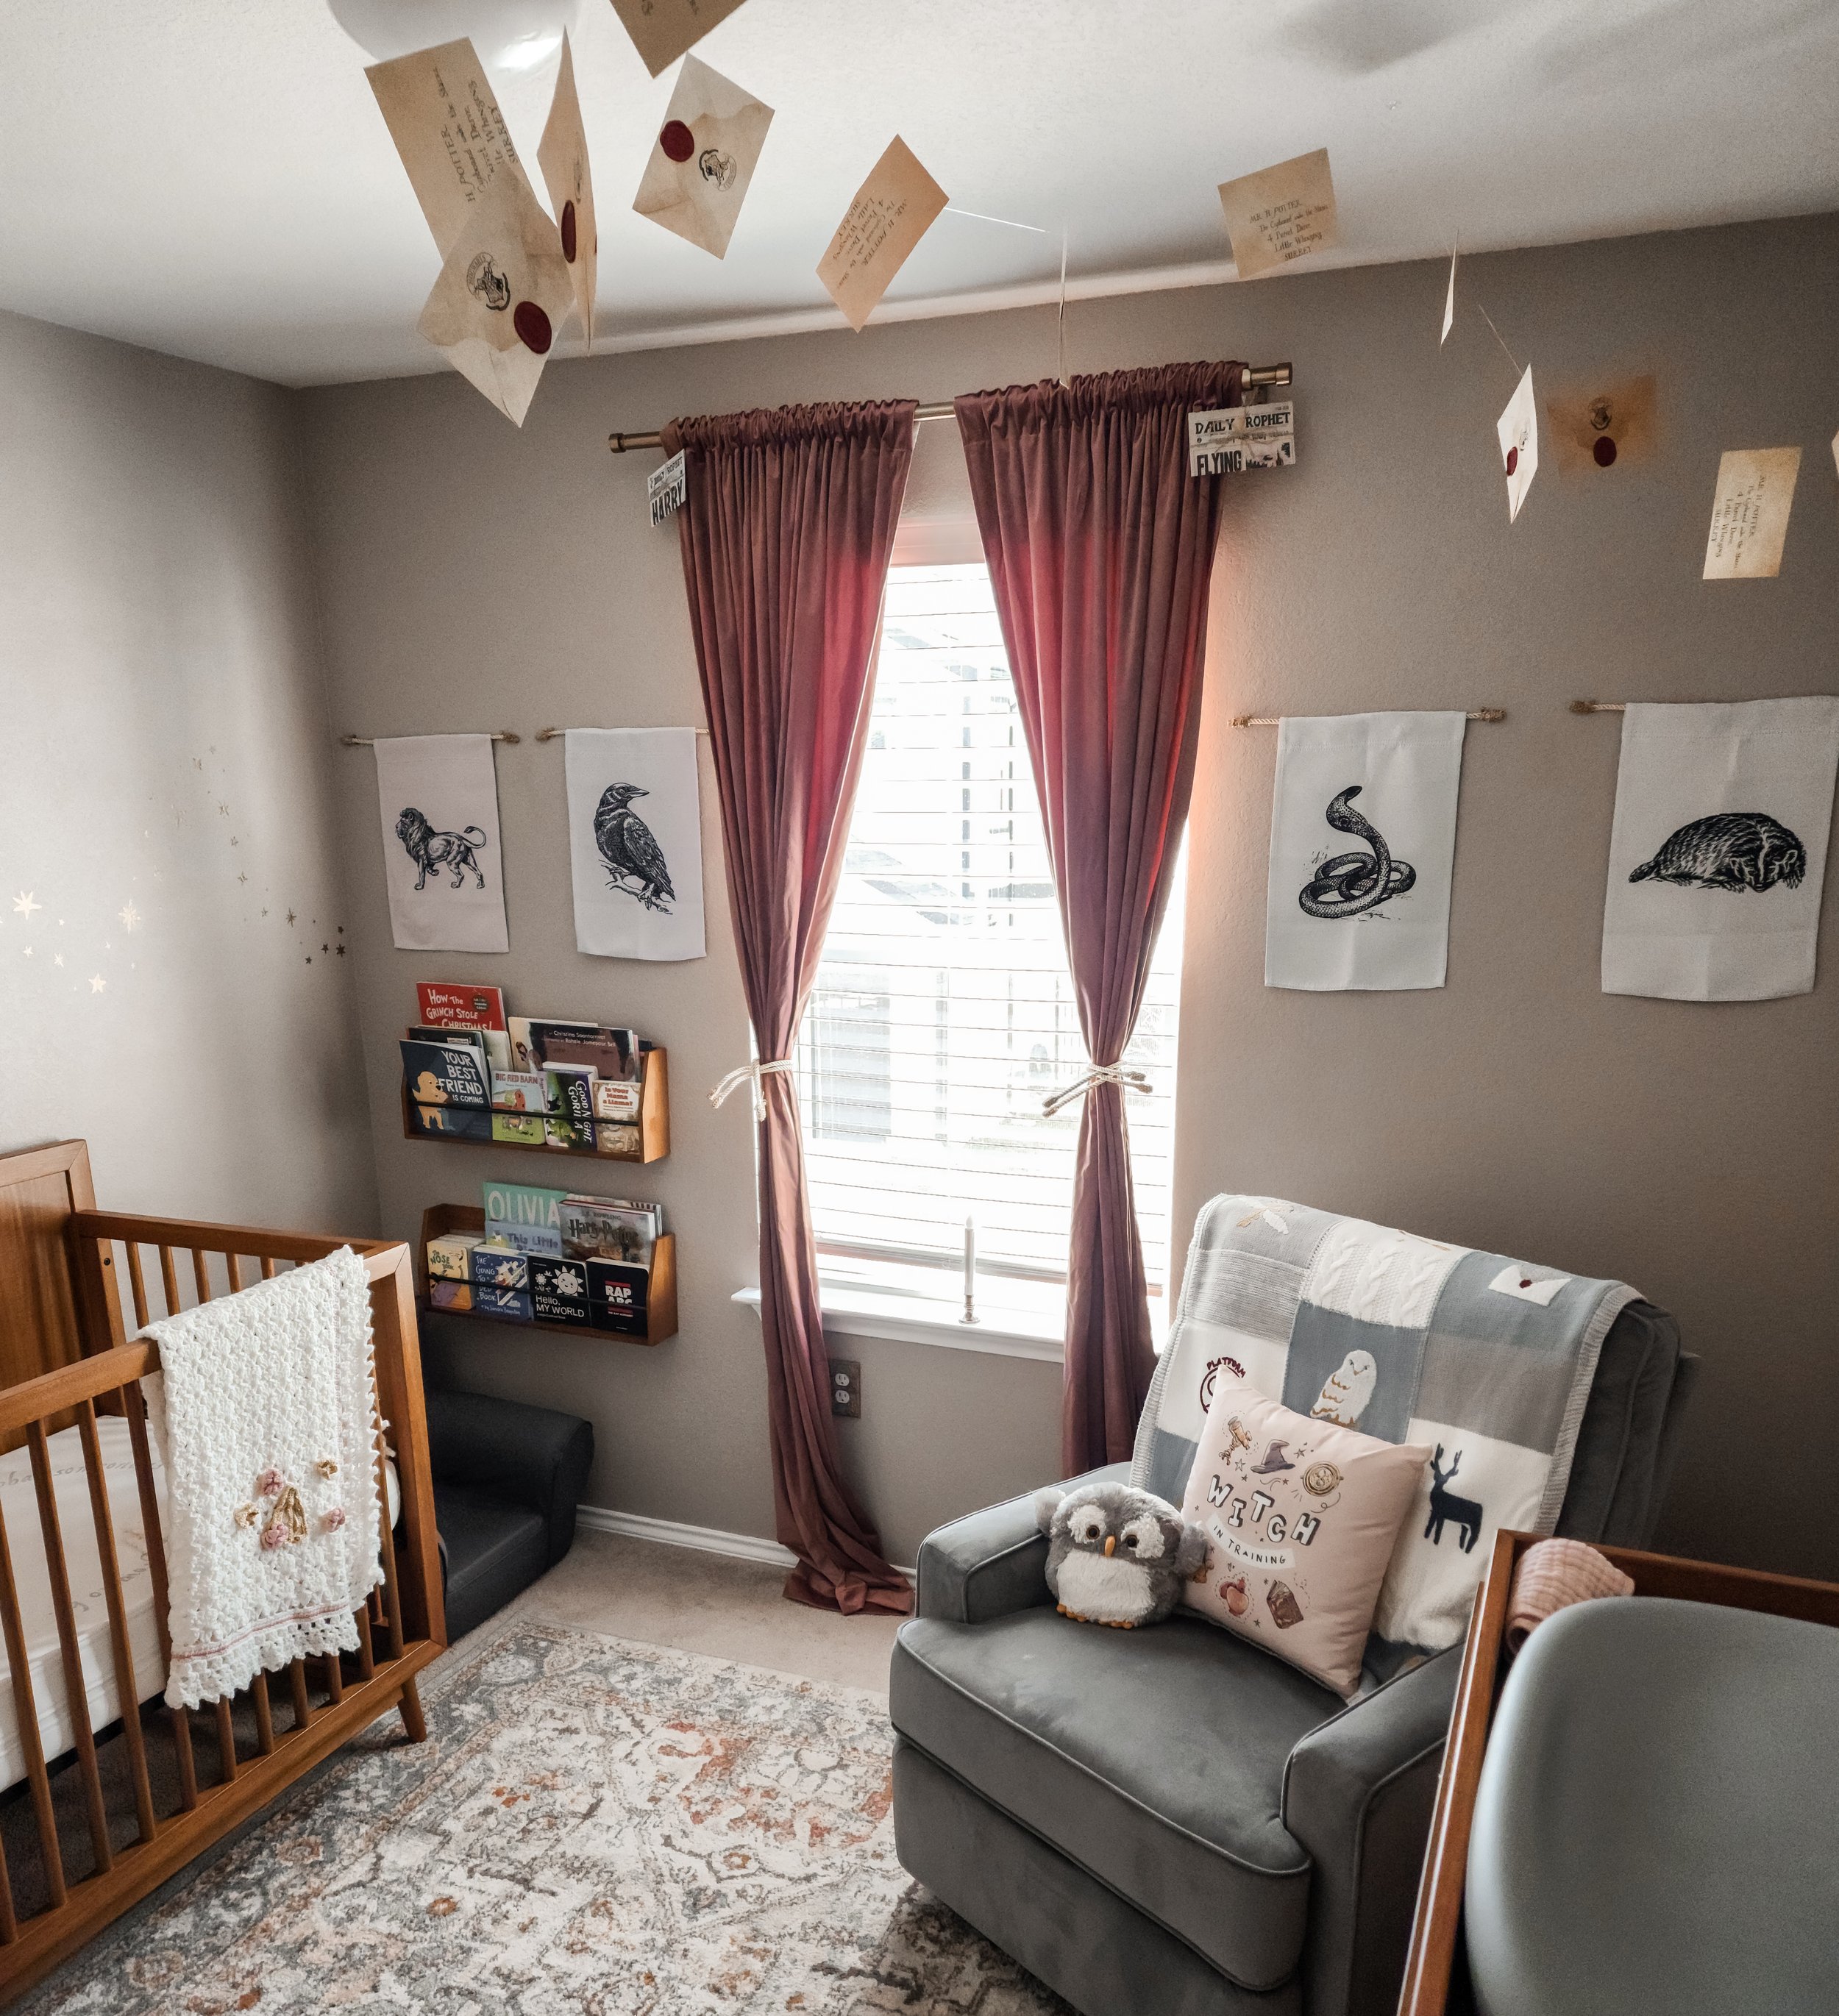


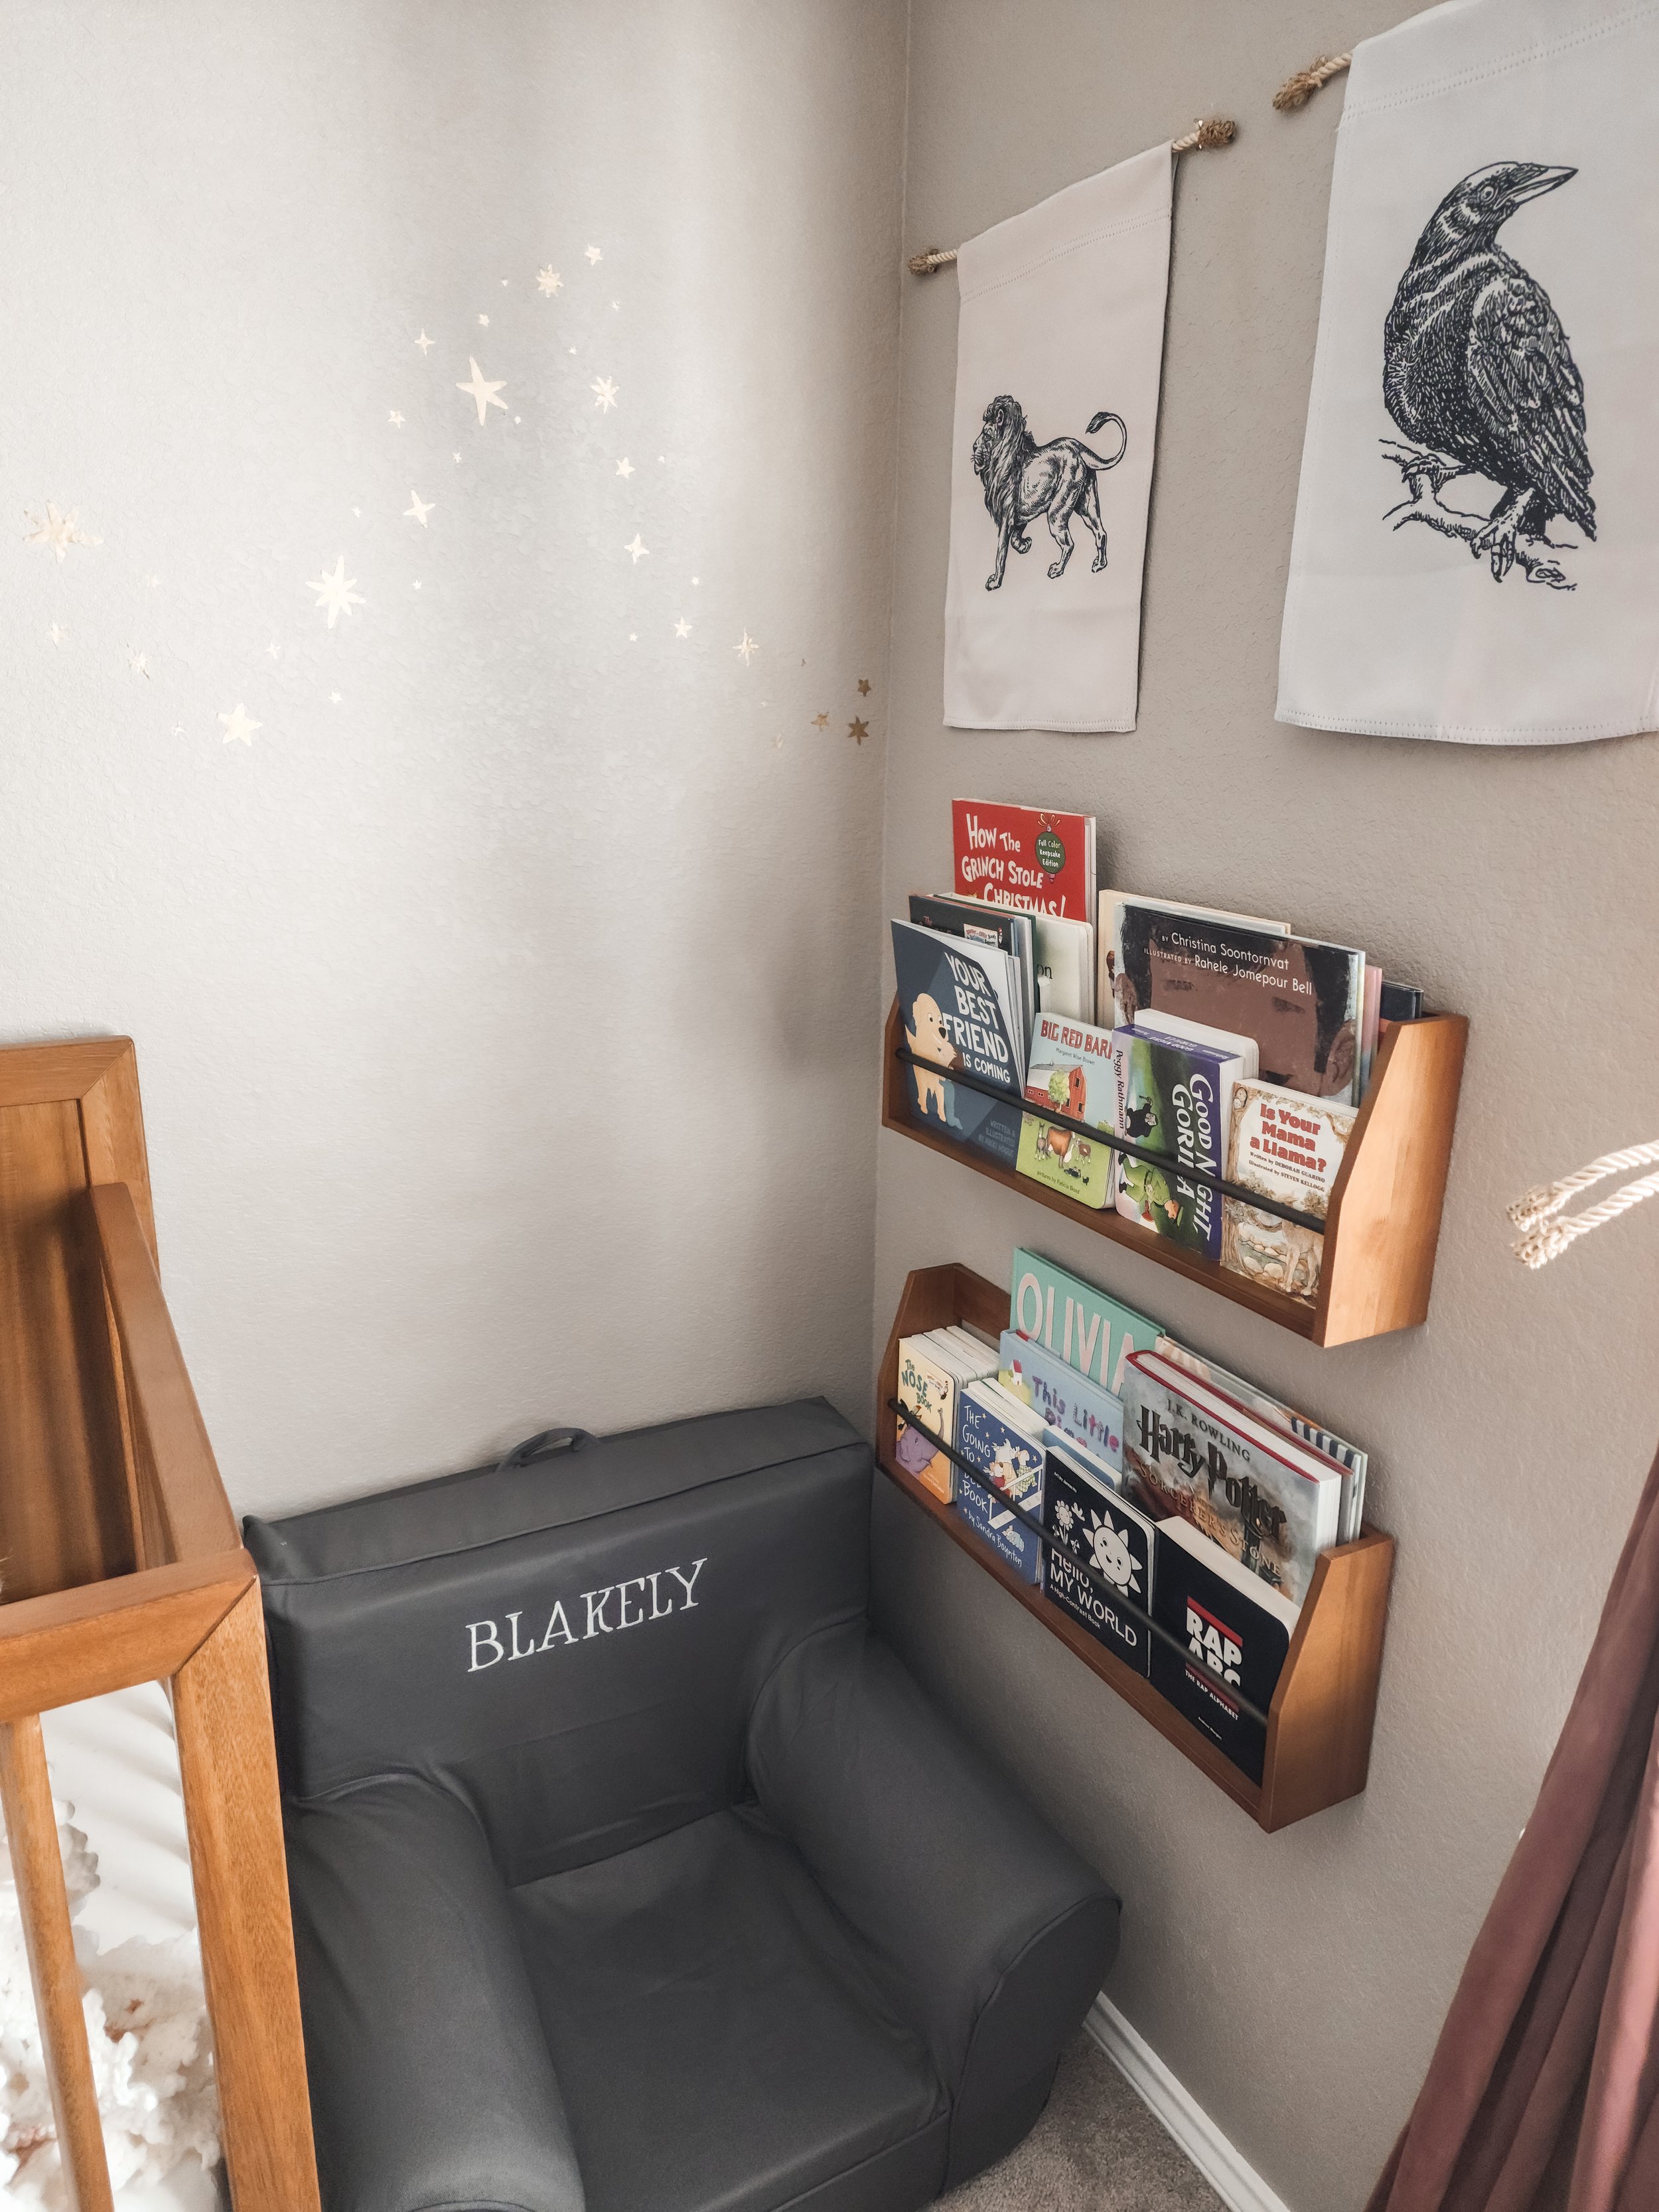

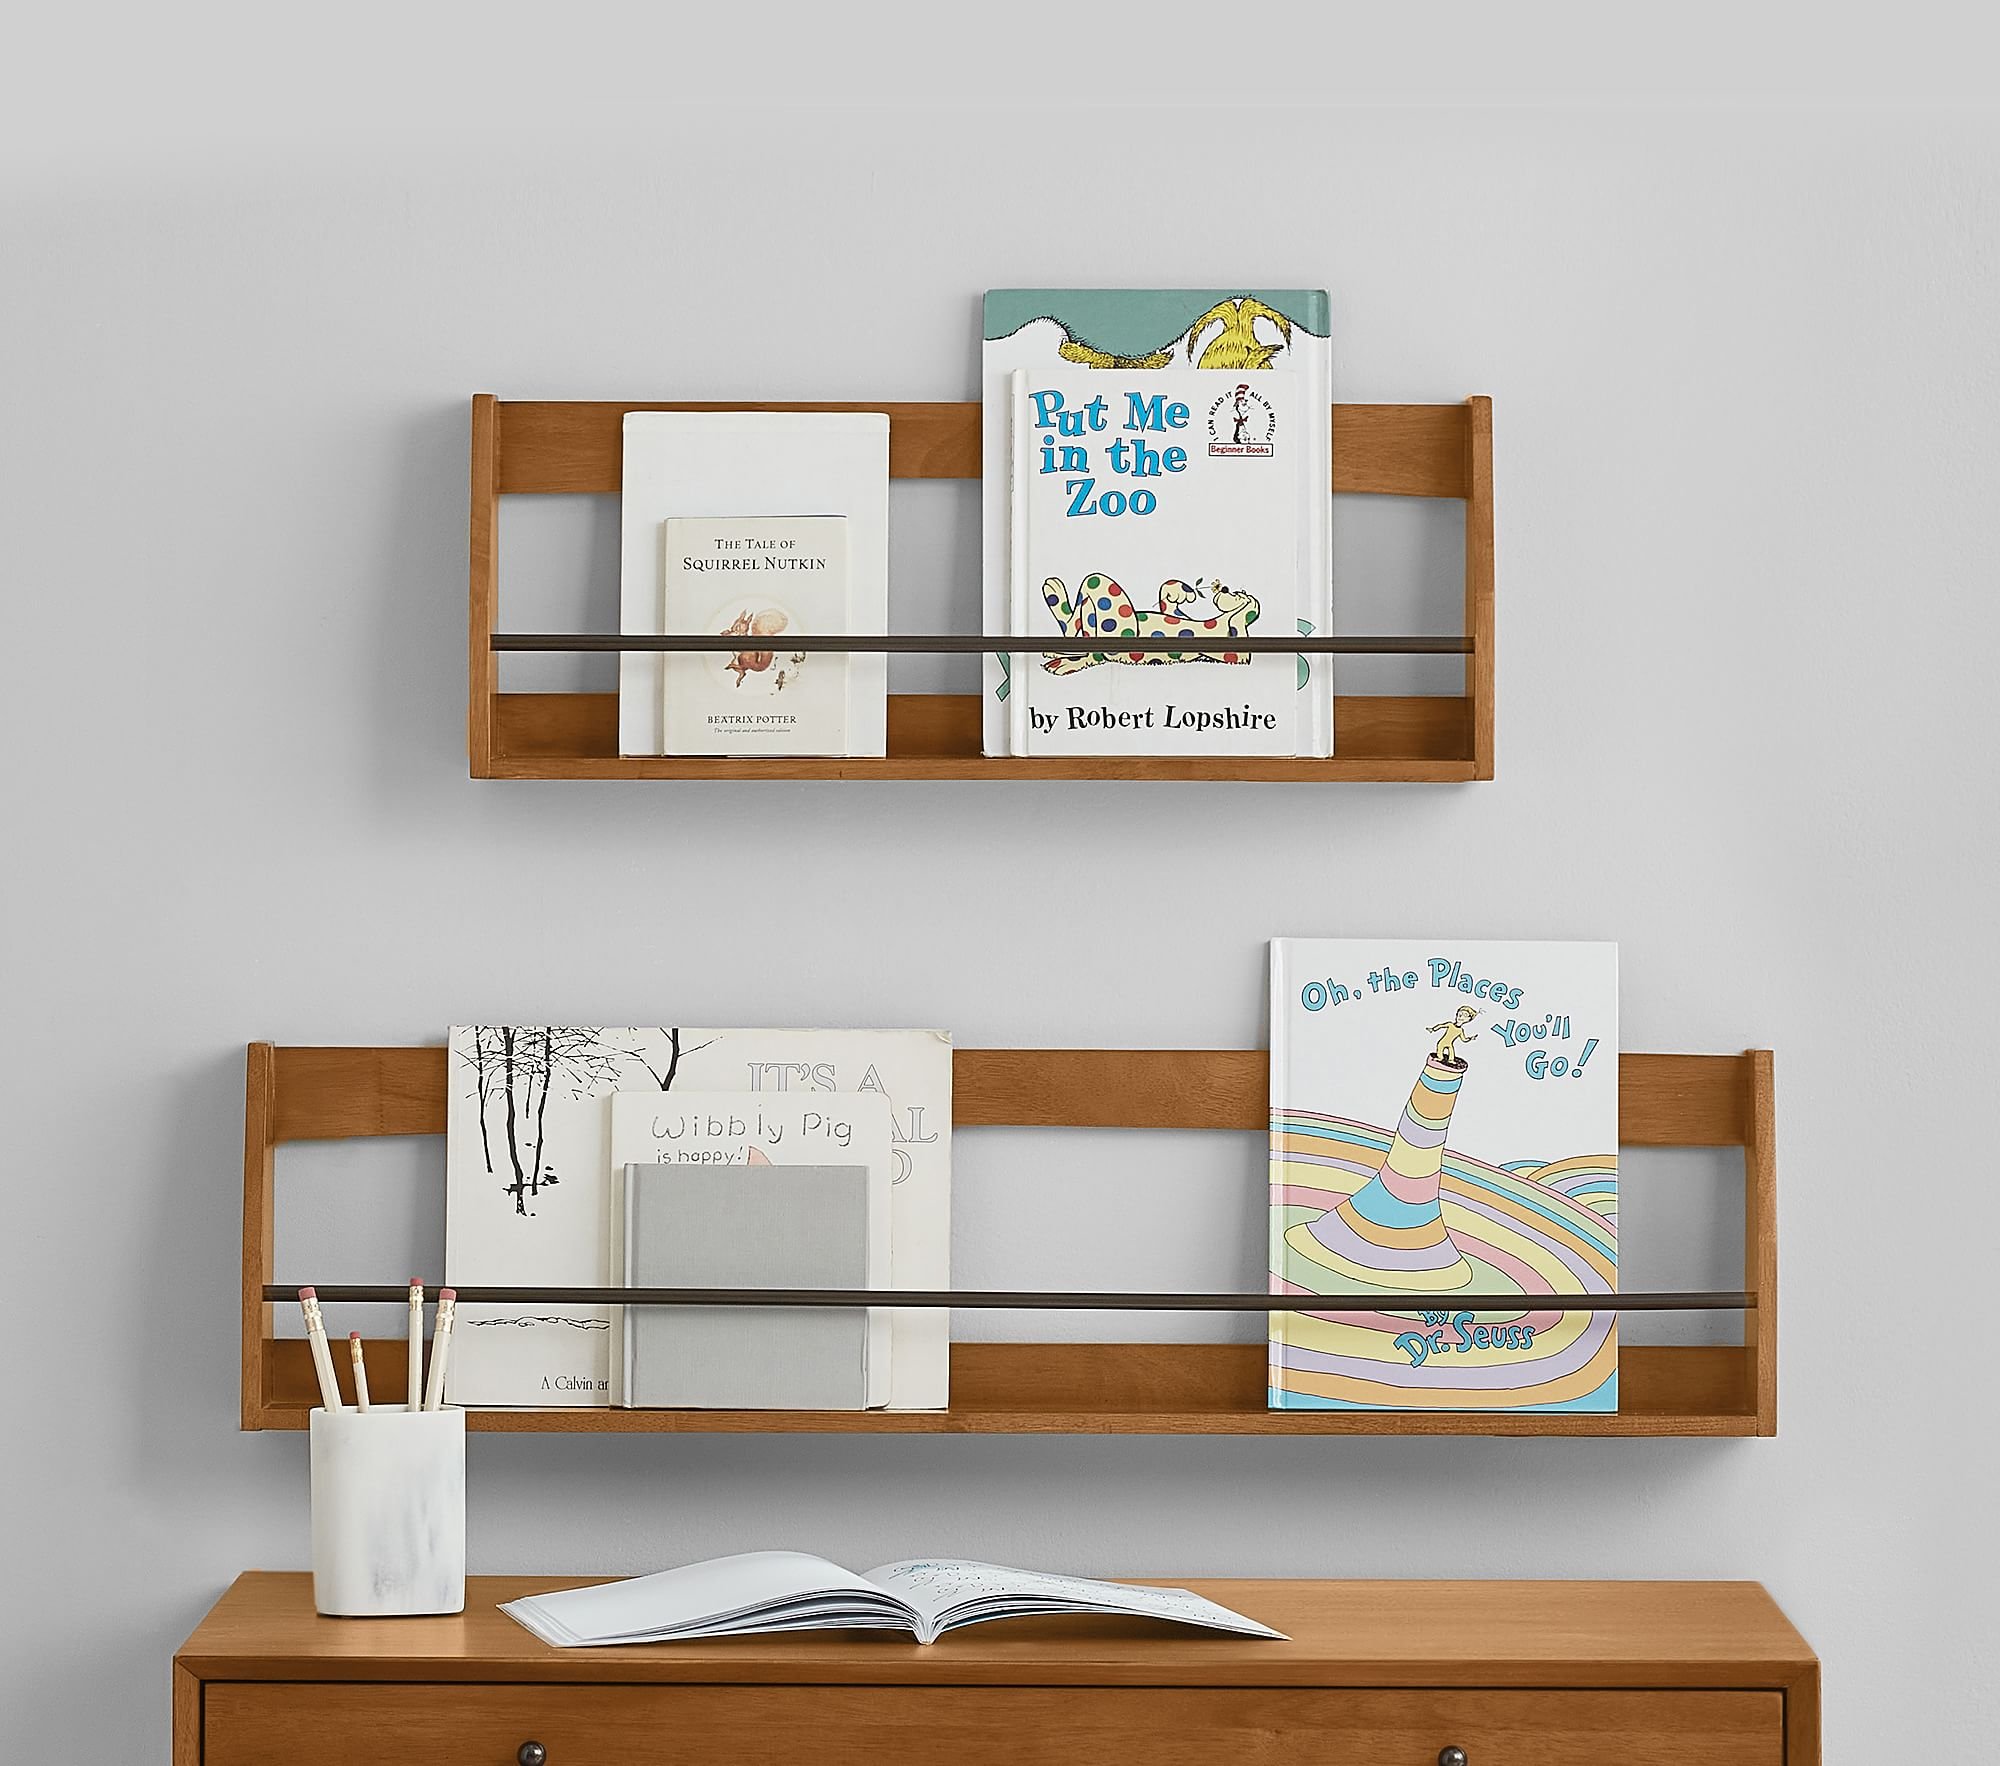
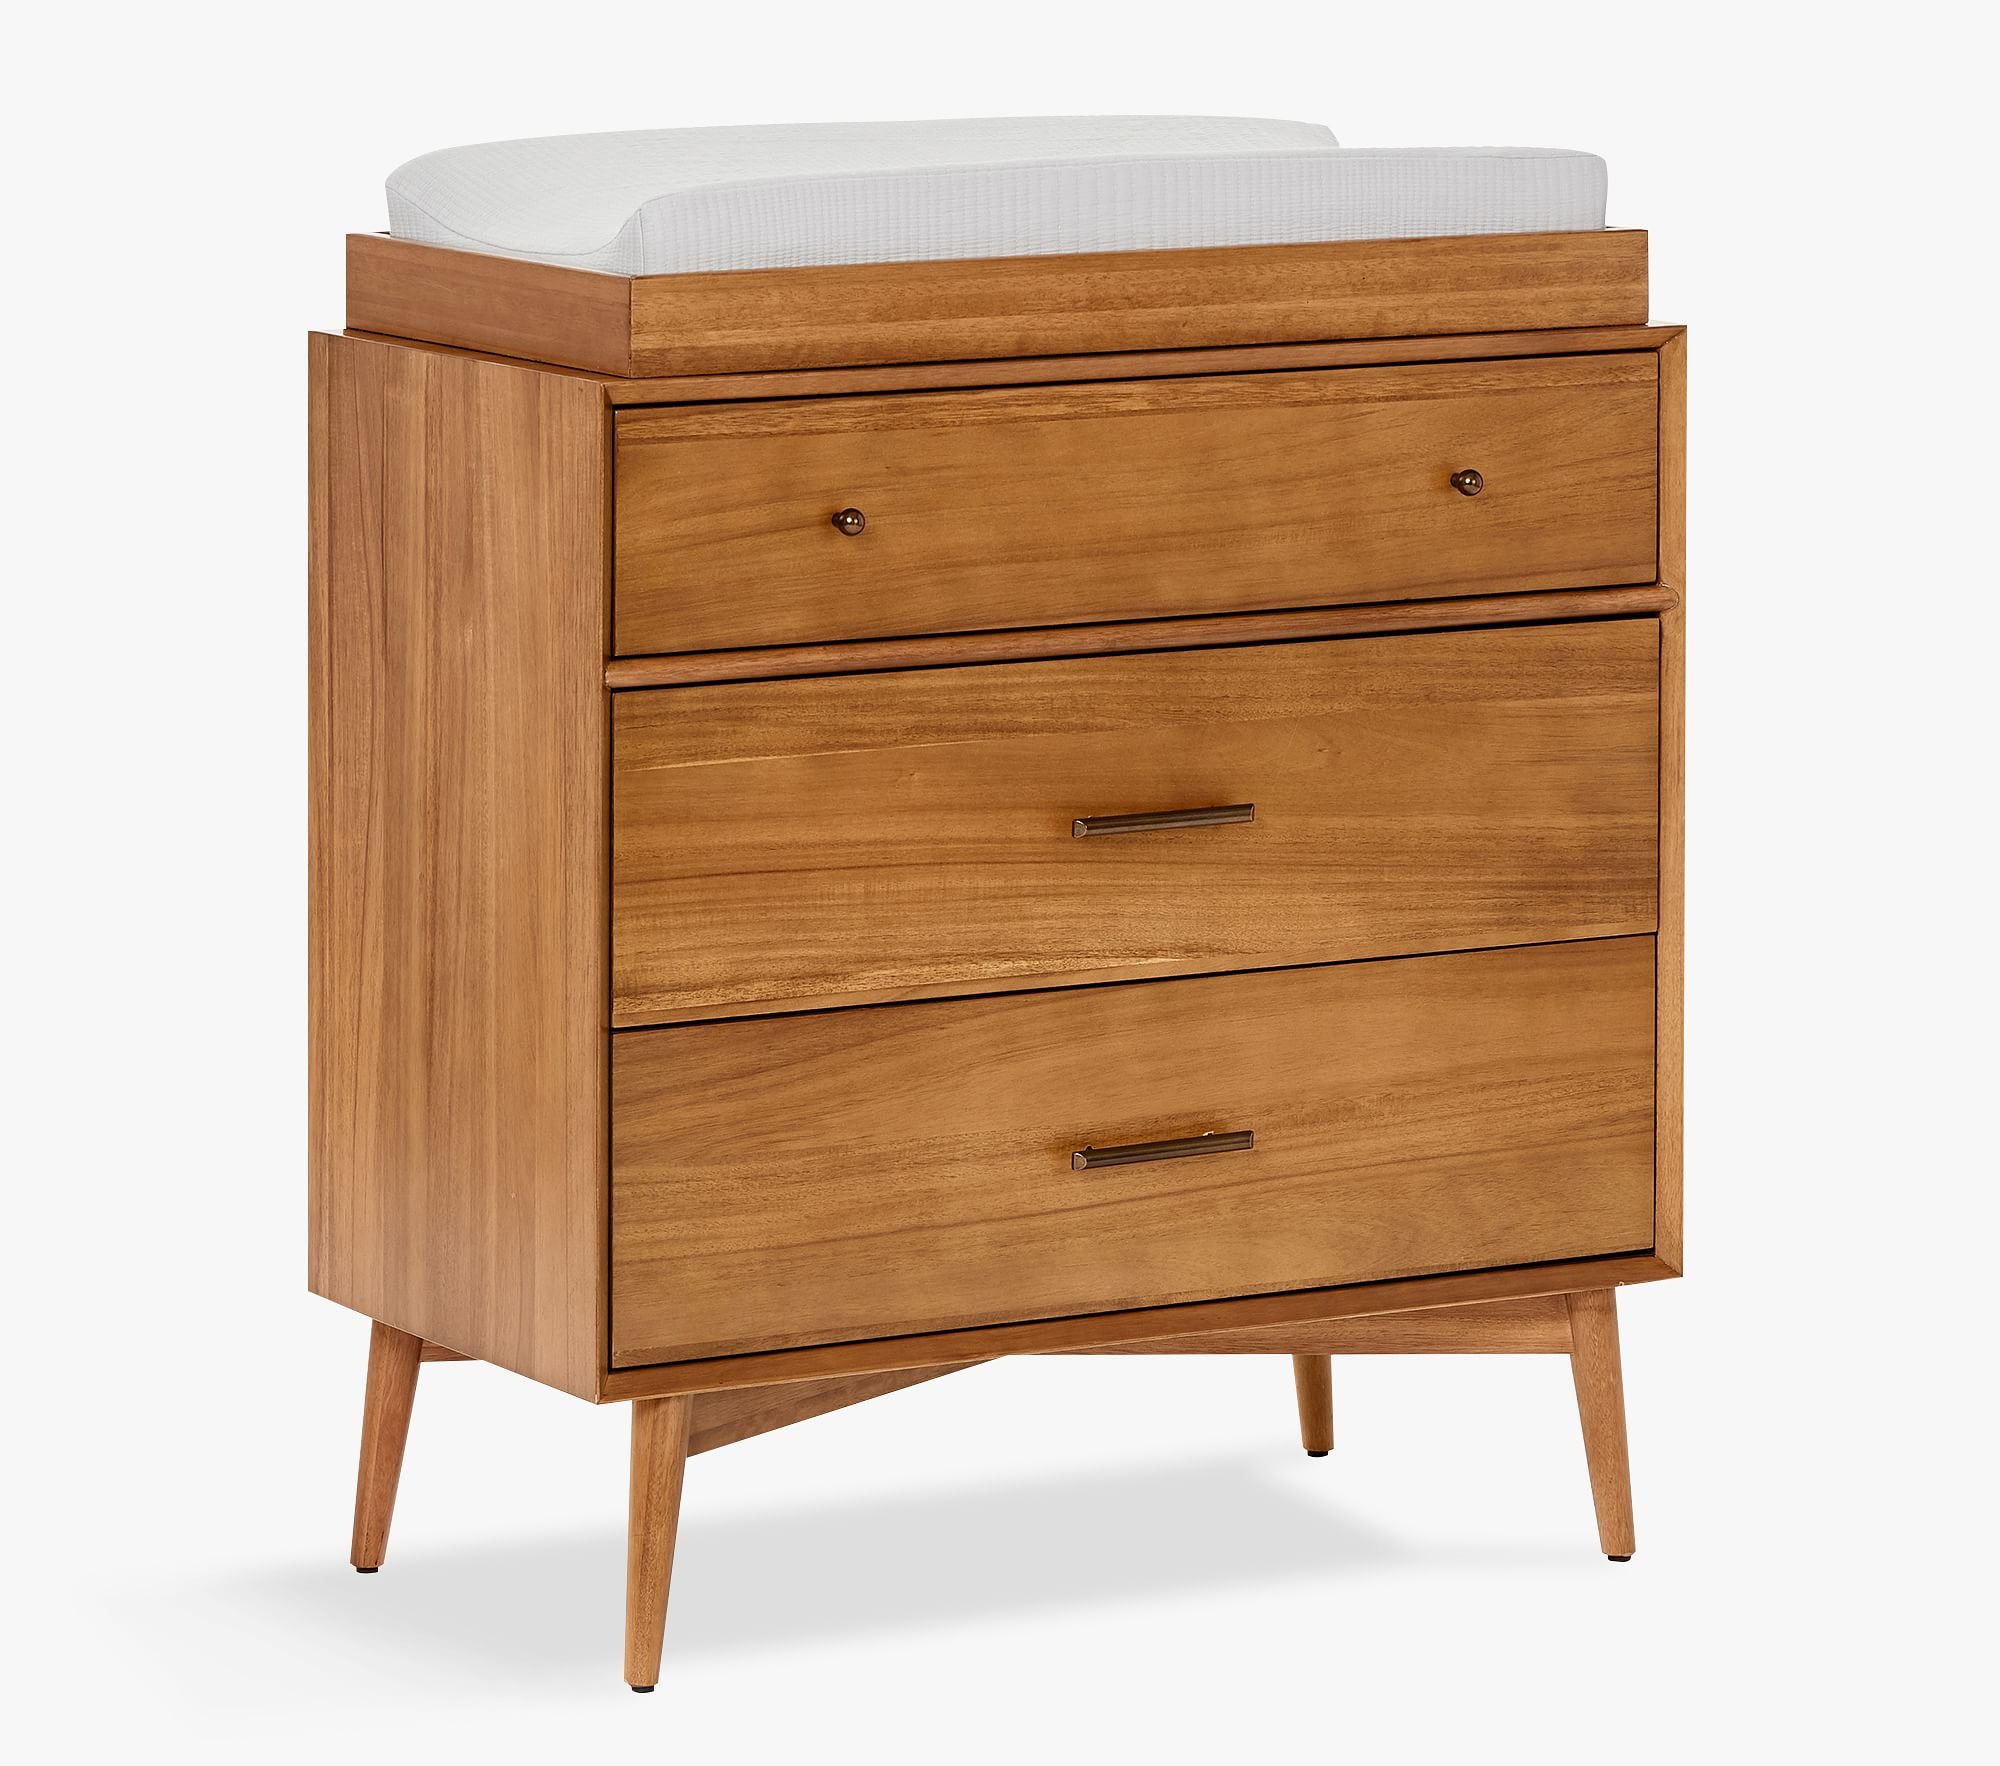
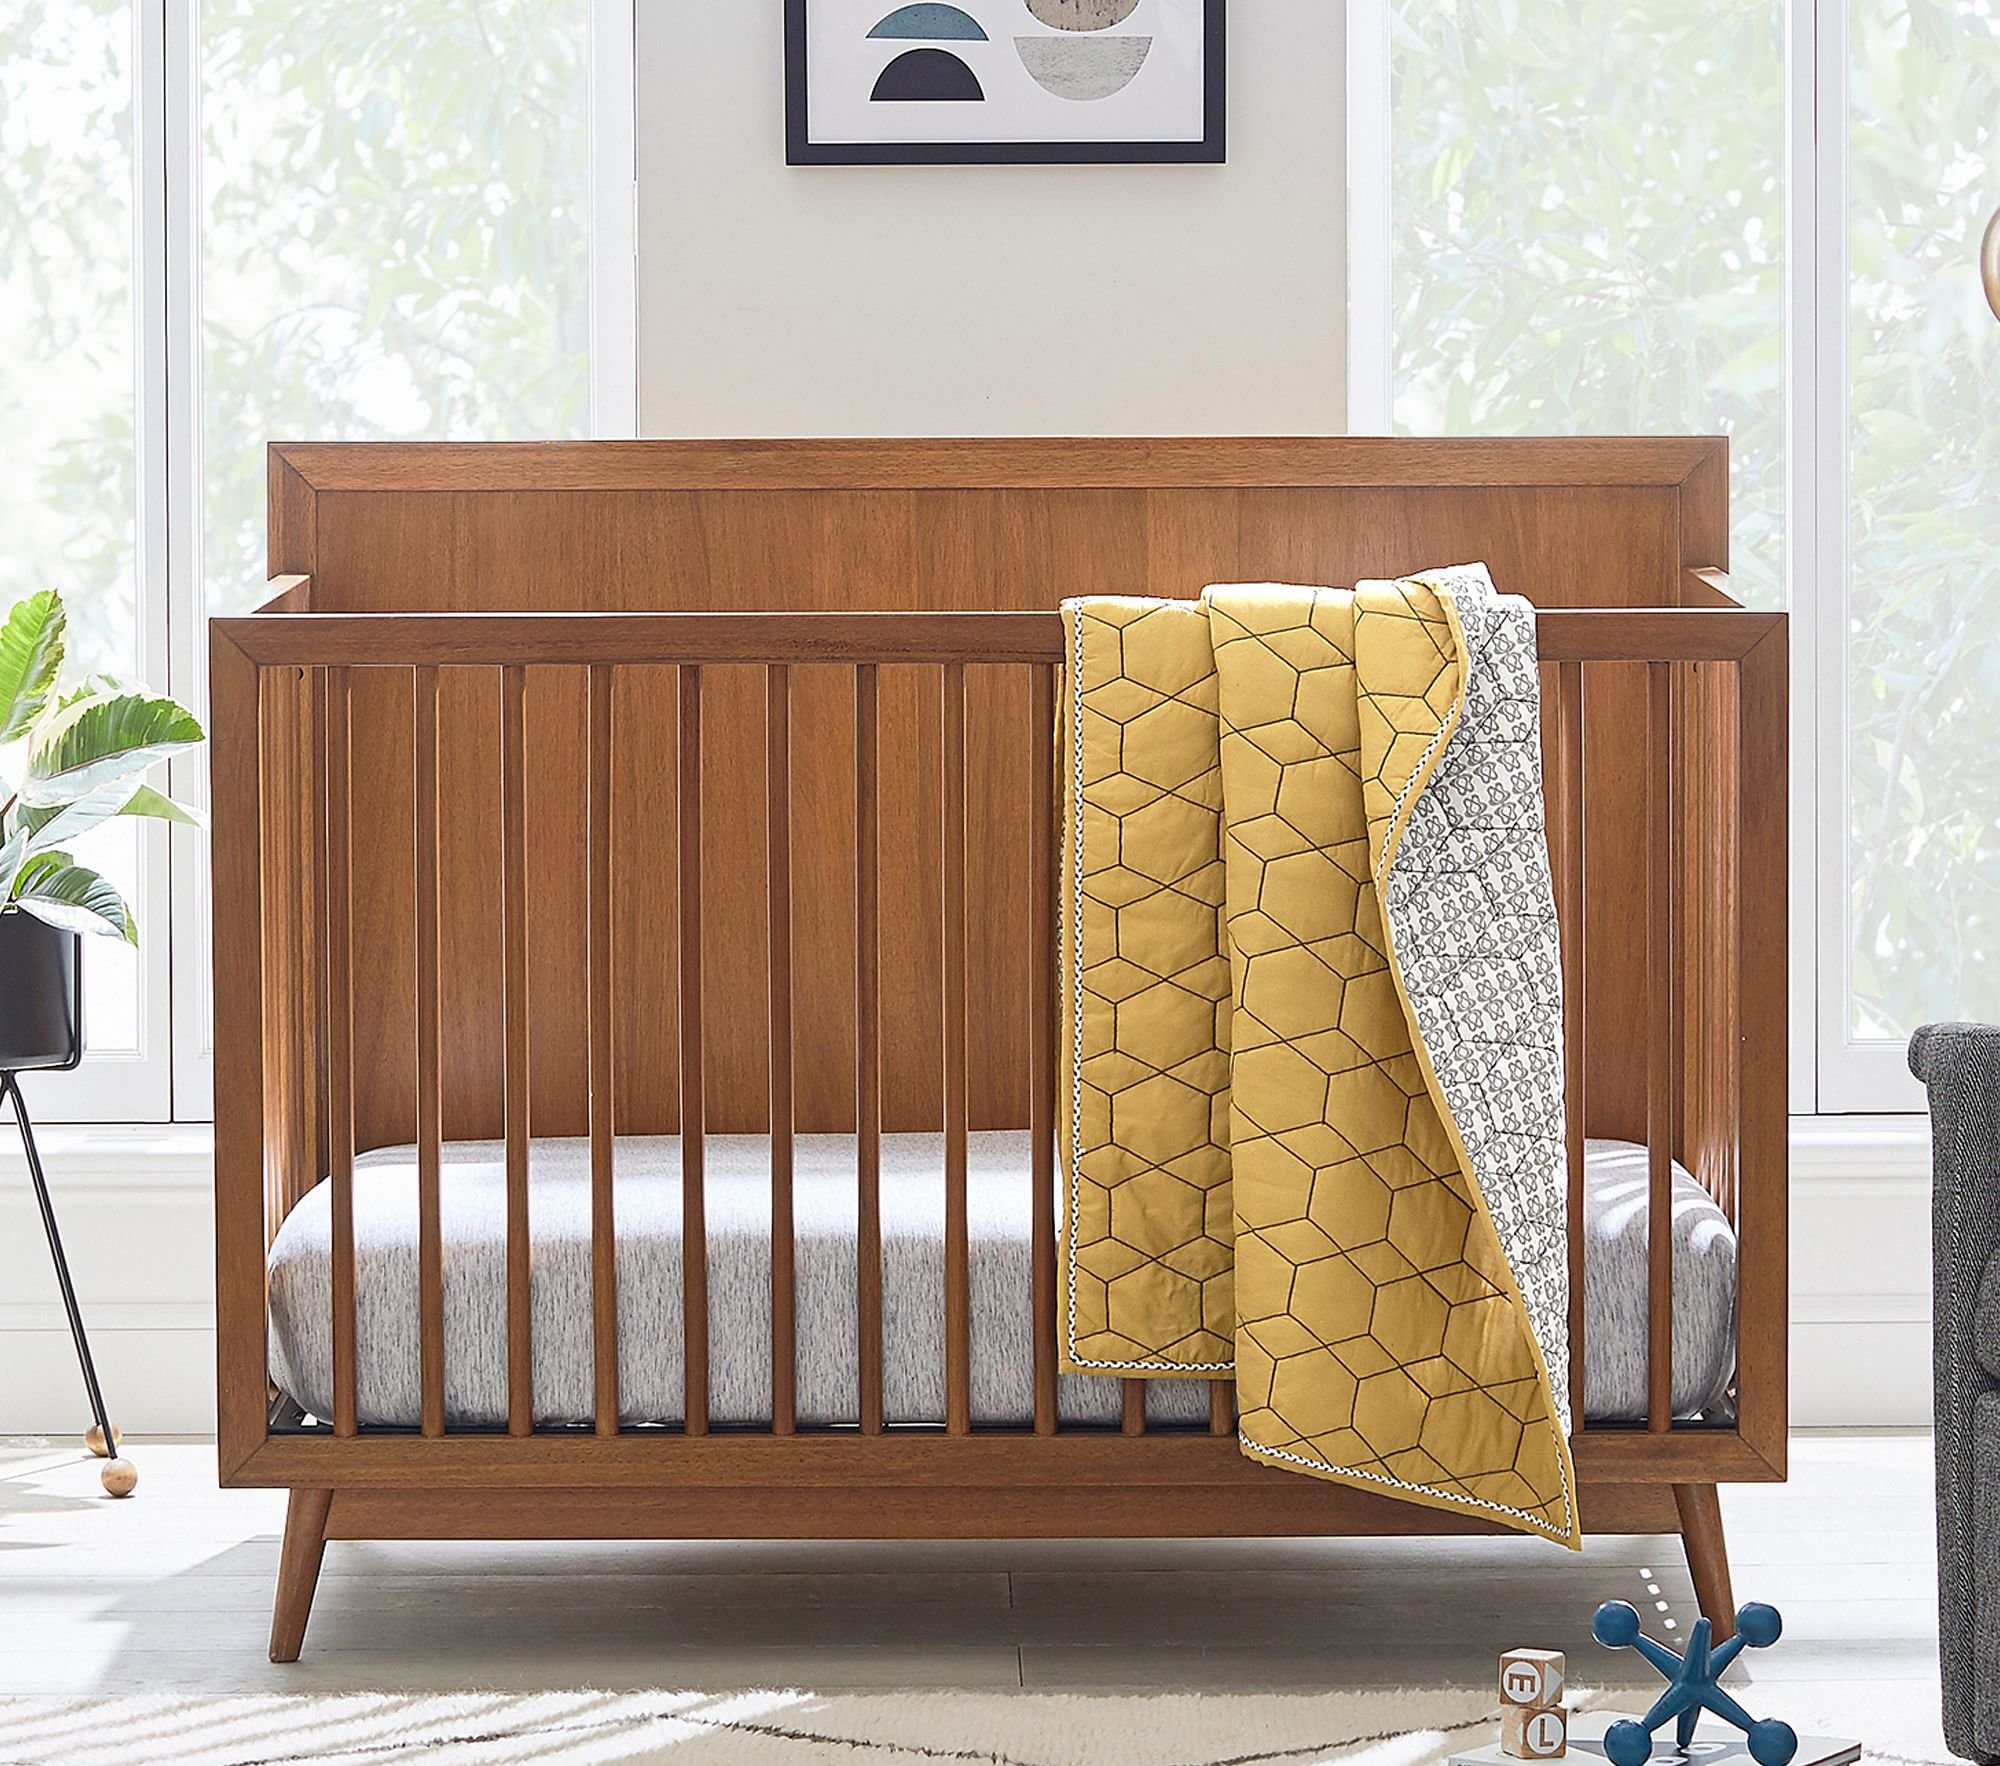
It took a while to figure out what furniture we wanted to go with — but we finally landed on the west elm x pbk mid-century collab for the crib, changing table & the book shelves.
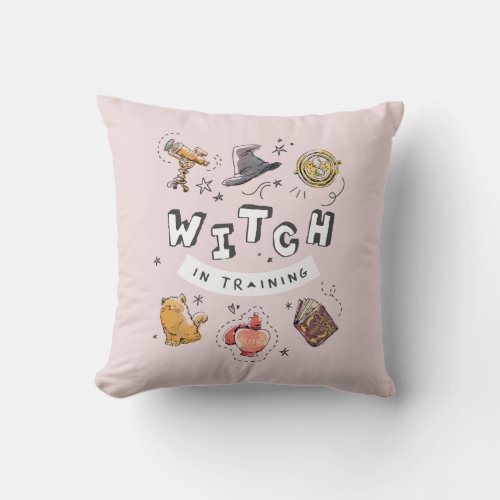
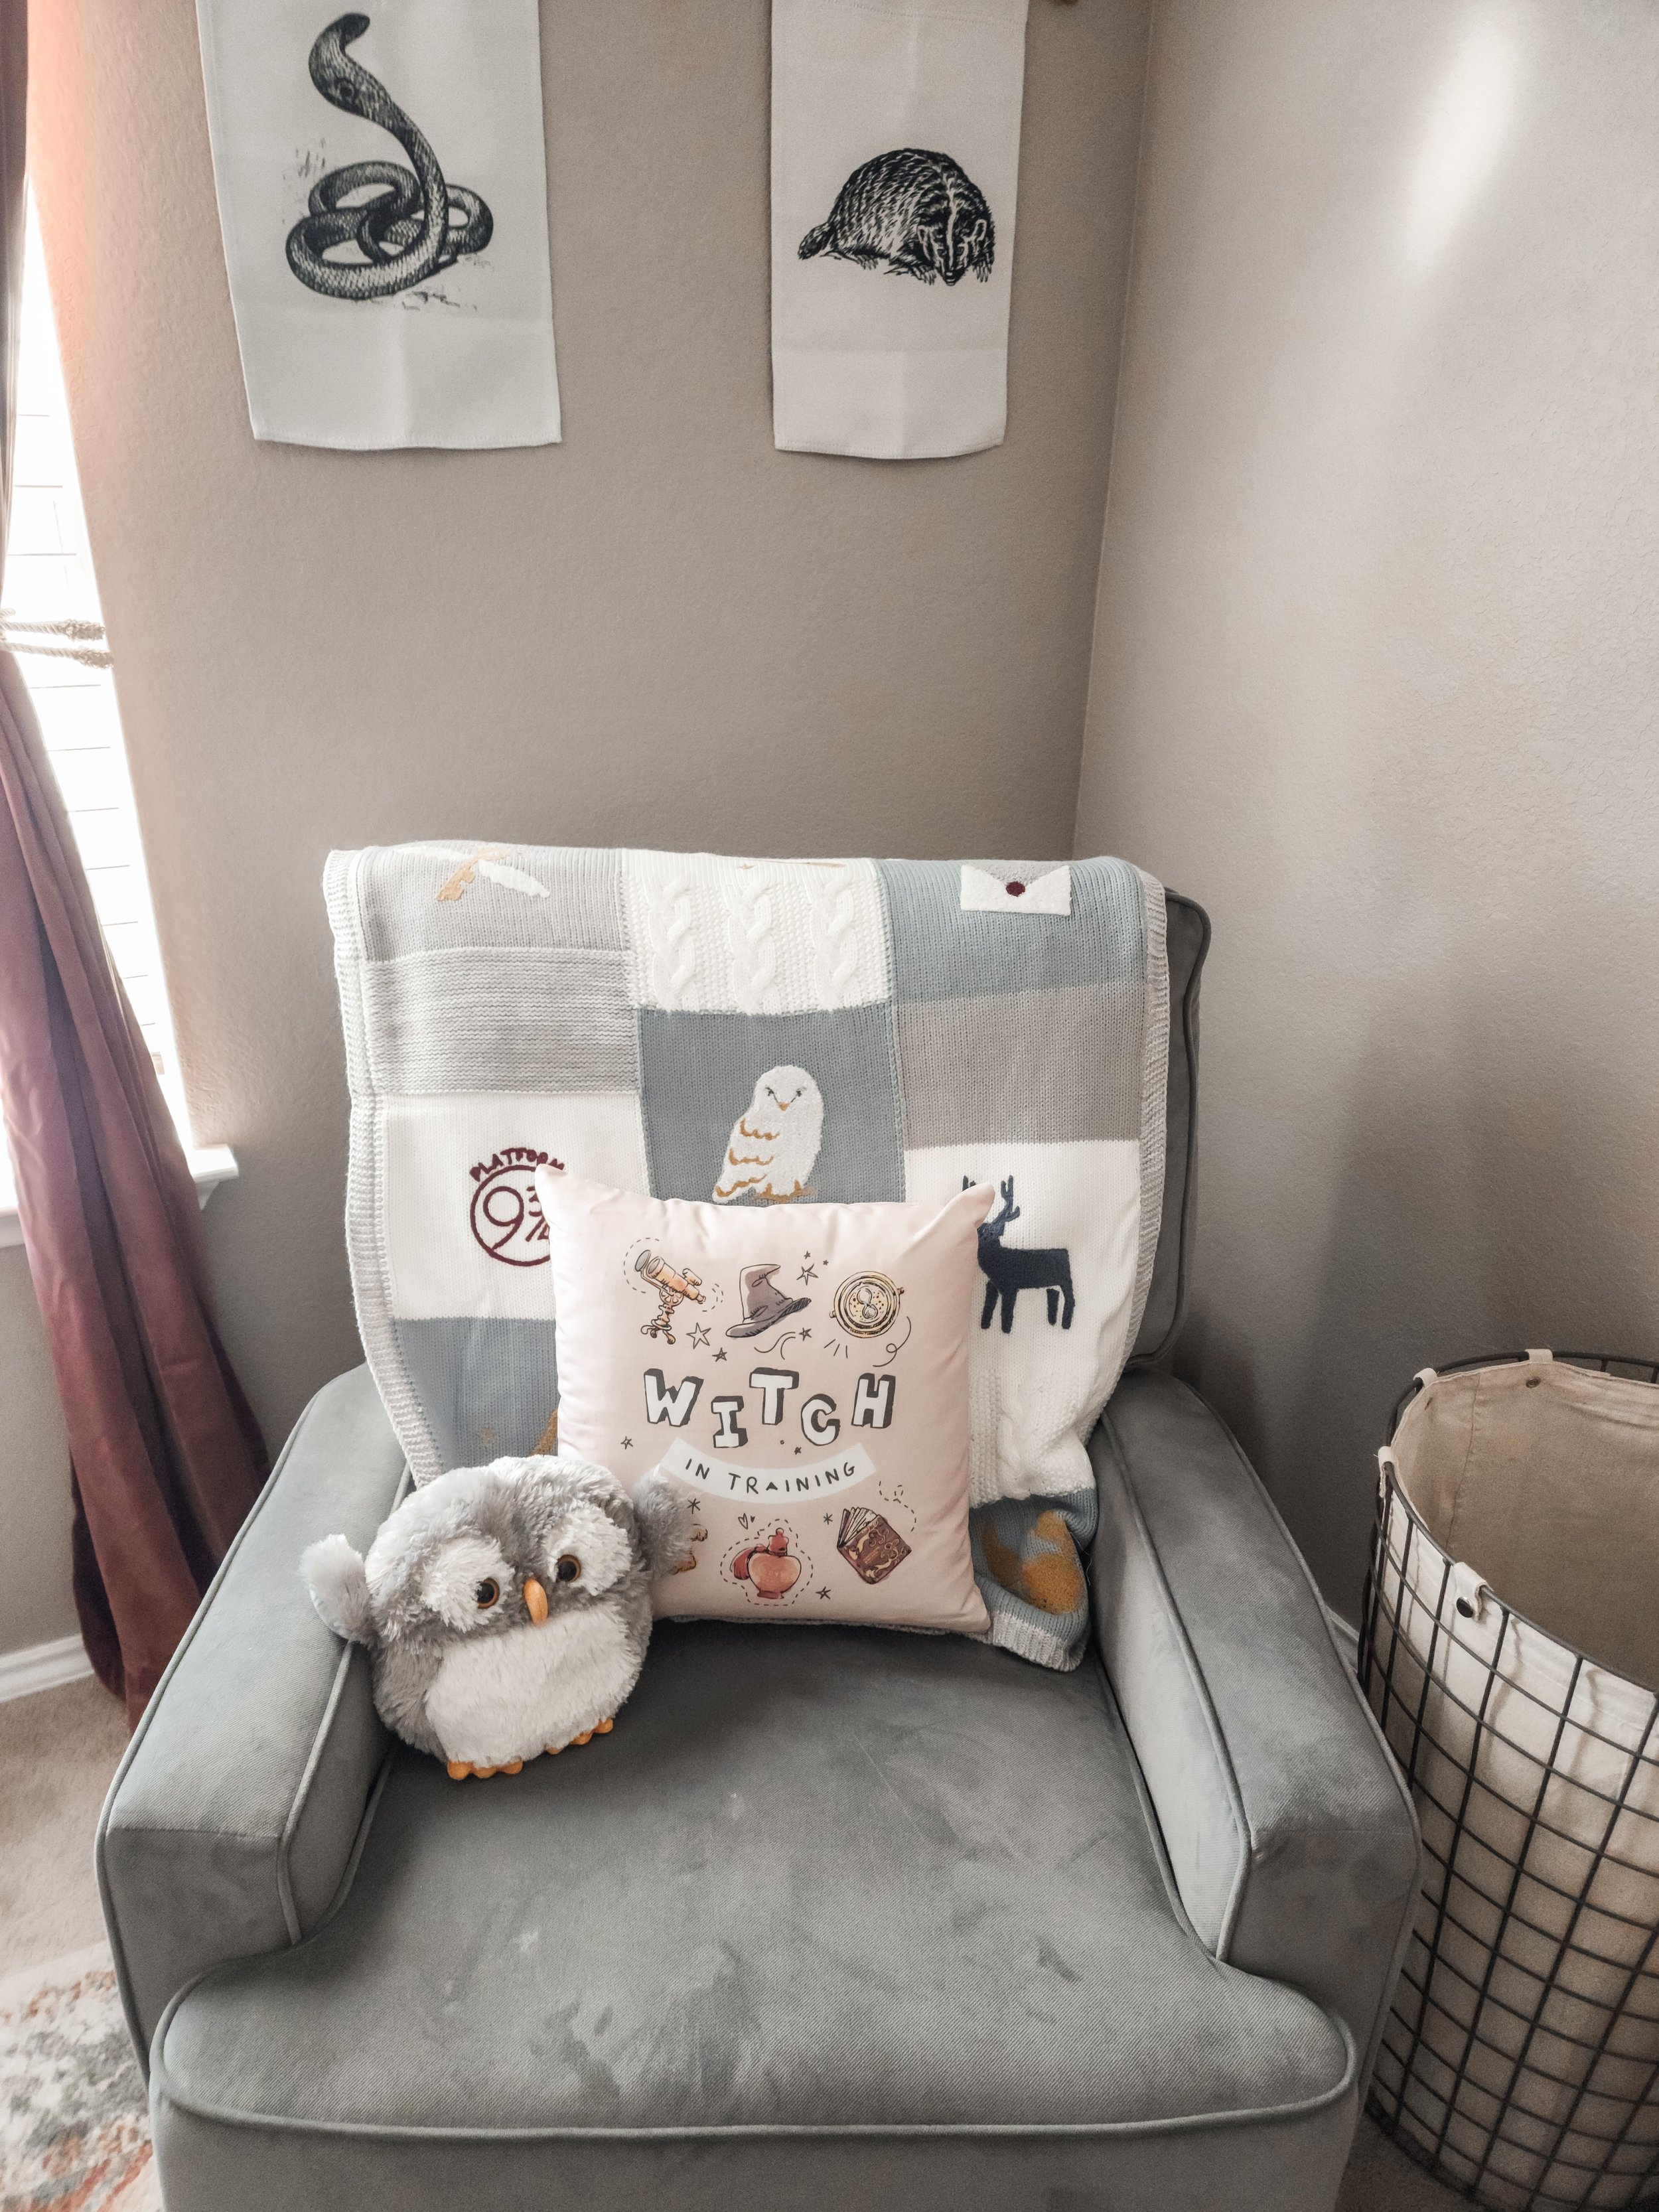
We added the rocking recliner over the summer, and I will say that it’s not my favorite. But, the price was right and it does the job for now. We may replace it with a higher backed option in the future. That is definitely something to keep in mind if you or your partner are tall. The “Witch in Training” pillow is something I found on Zazzle — they had other cute options like “Wizard in Training”, “Seeker in Training” along with some others. It added the perfect touch, and comes in handy when you need some extra support while feeding in the chair.

Quick note: In the early part of 2022, we had all of the bedroom closets redone with the Elfa system from The Container Store. I highly recommend! We had a great experience with them coming out, designing each space to our needs and installing everything. I will add that I wish we’d kept in mind that this closet would eventually be a nursery — because it’s very heavy on “office-type” storage. But, I’ve made it work without a lot of changes by using baskets and storage pieces we already had on hand. The great thing about Elfa is that we can always swap out pieces in the future if we find we need a different configuration.
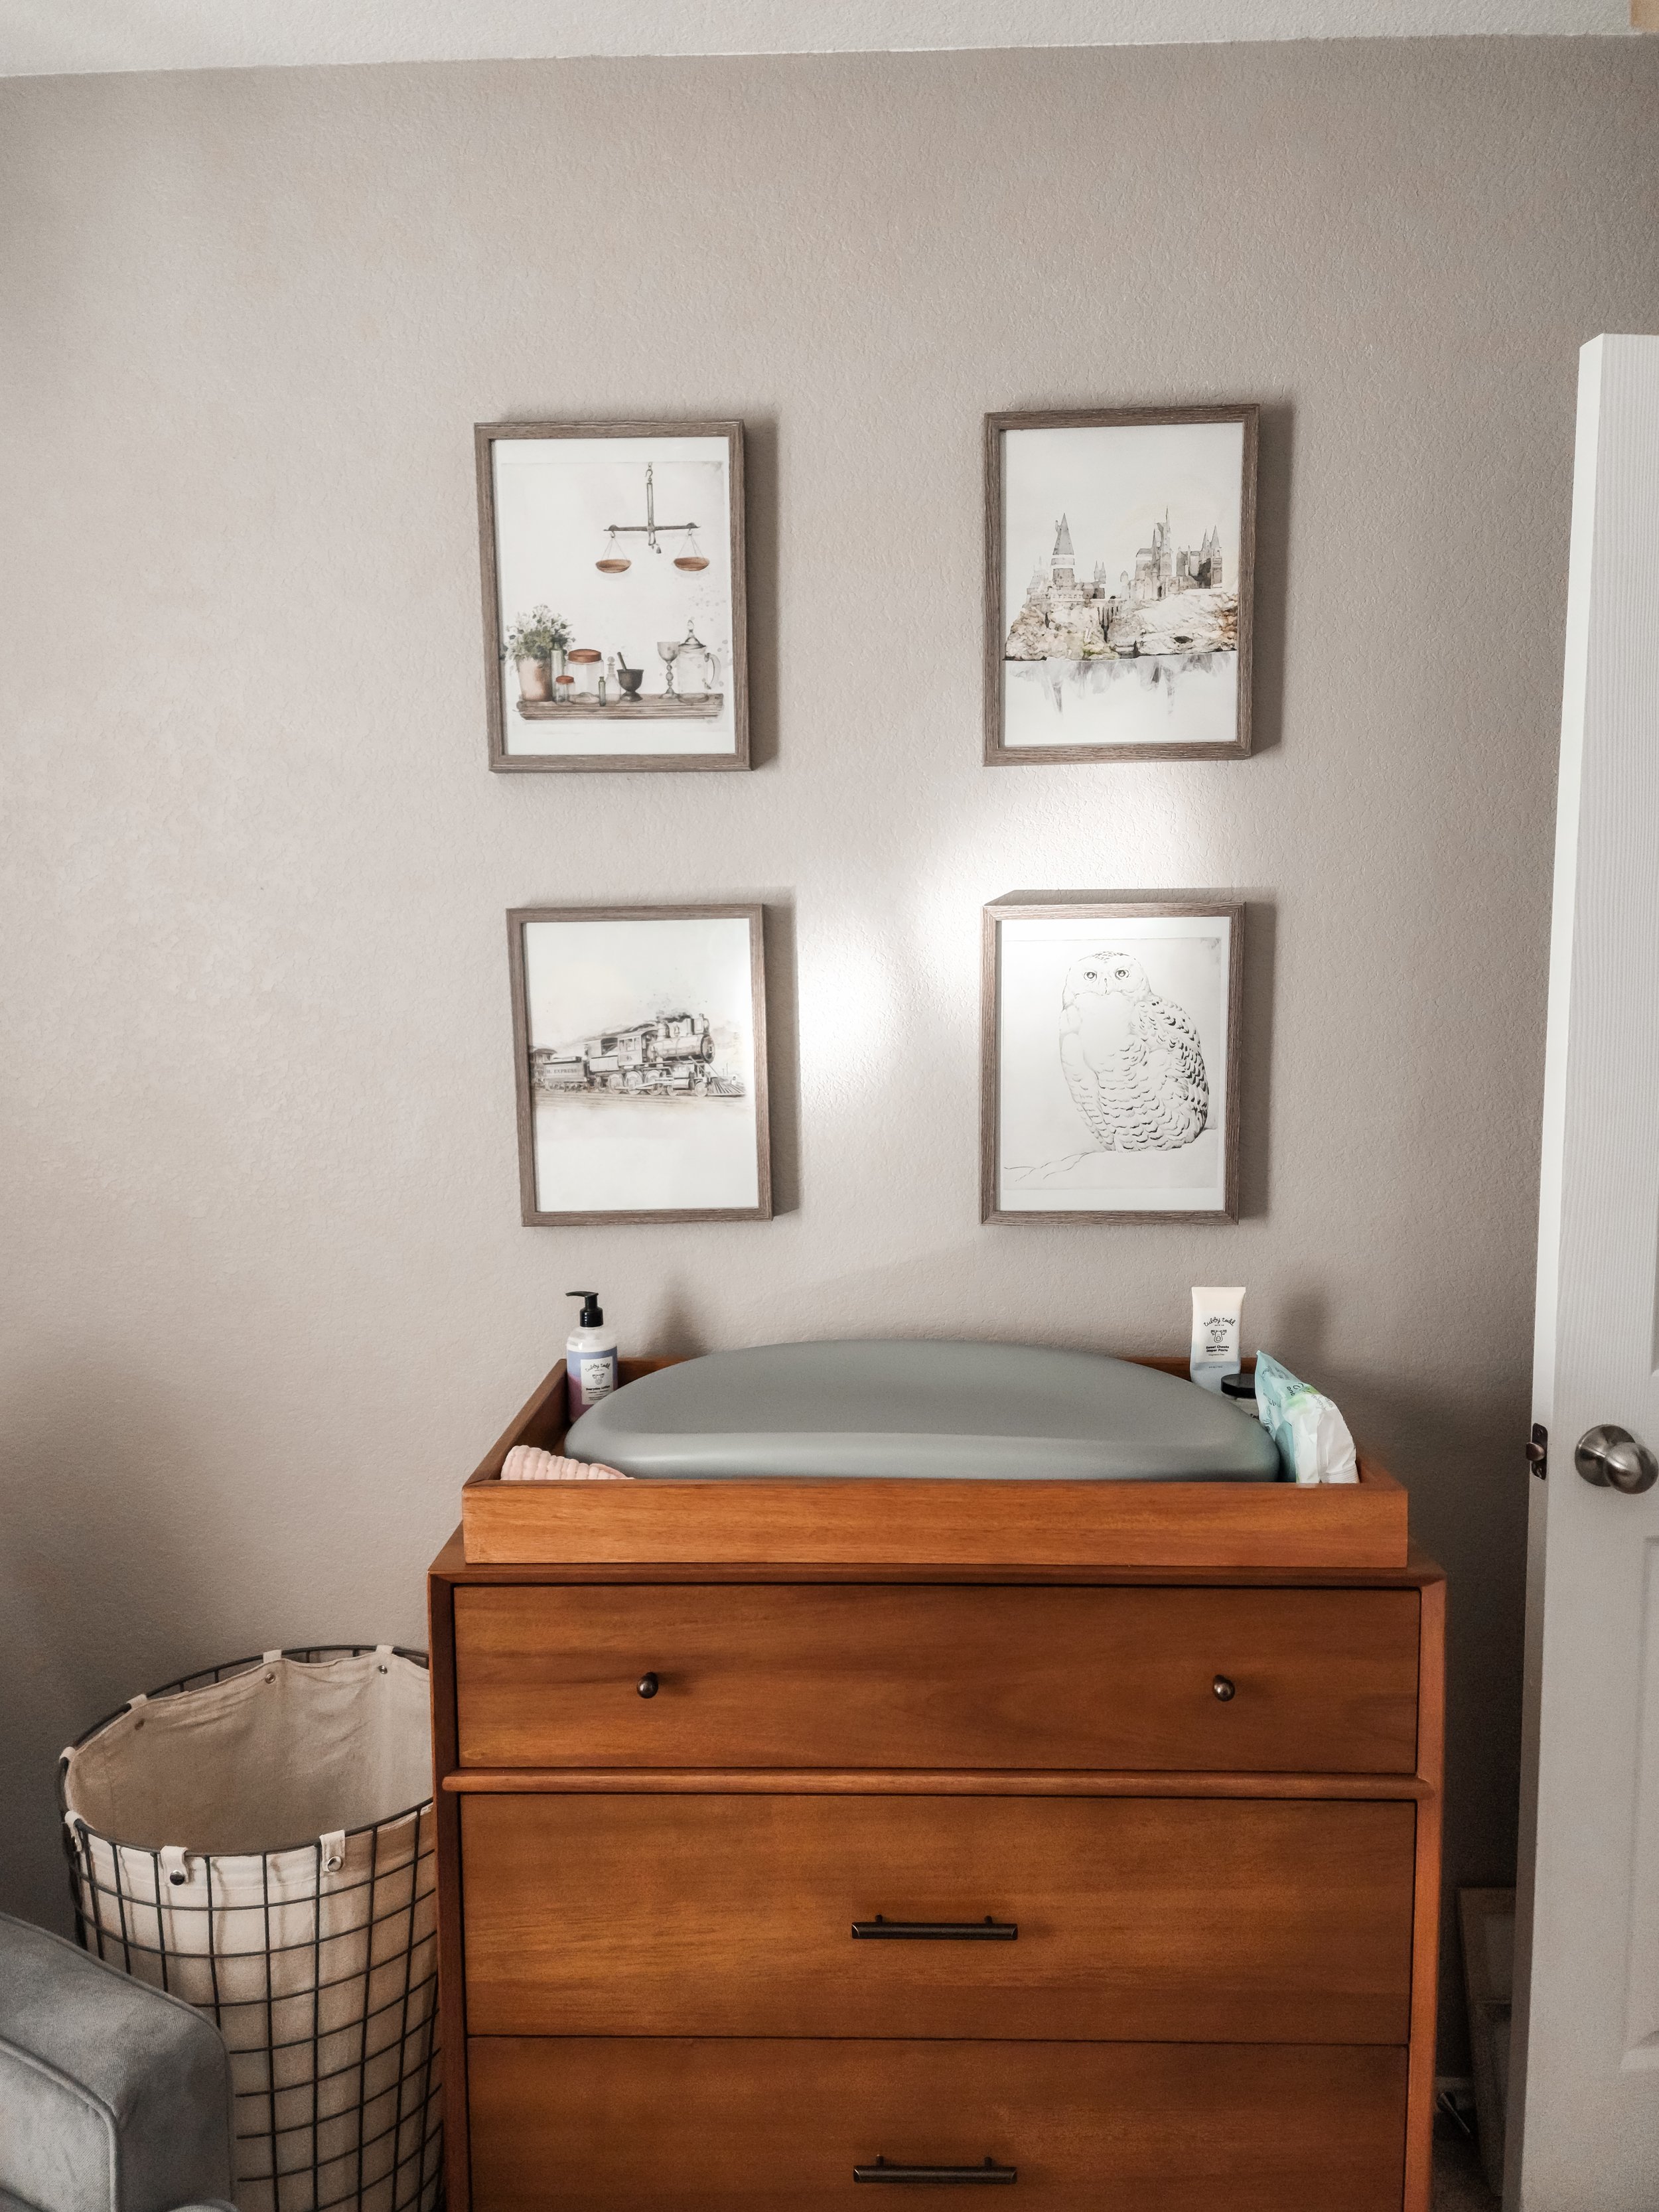

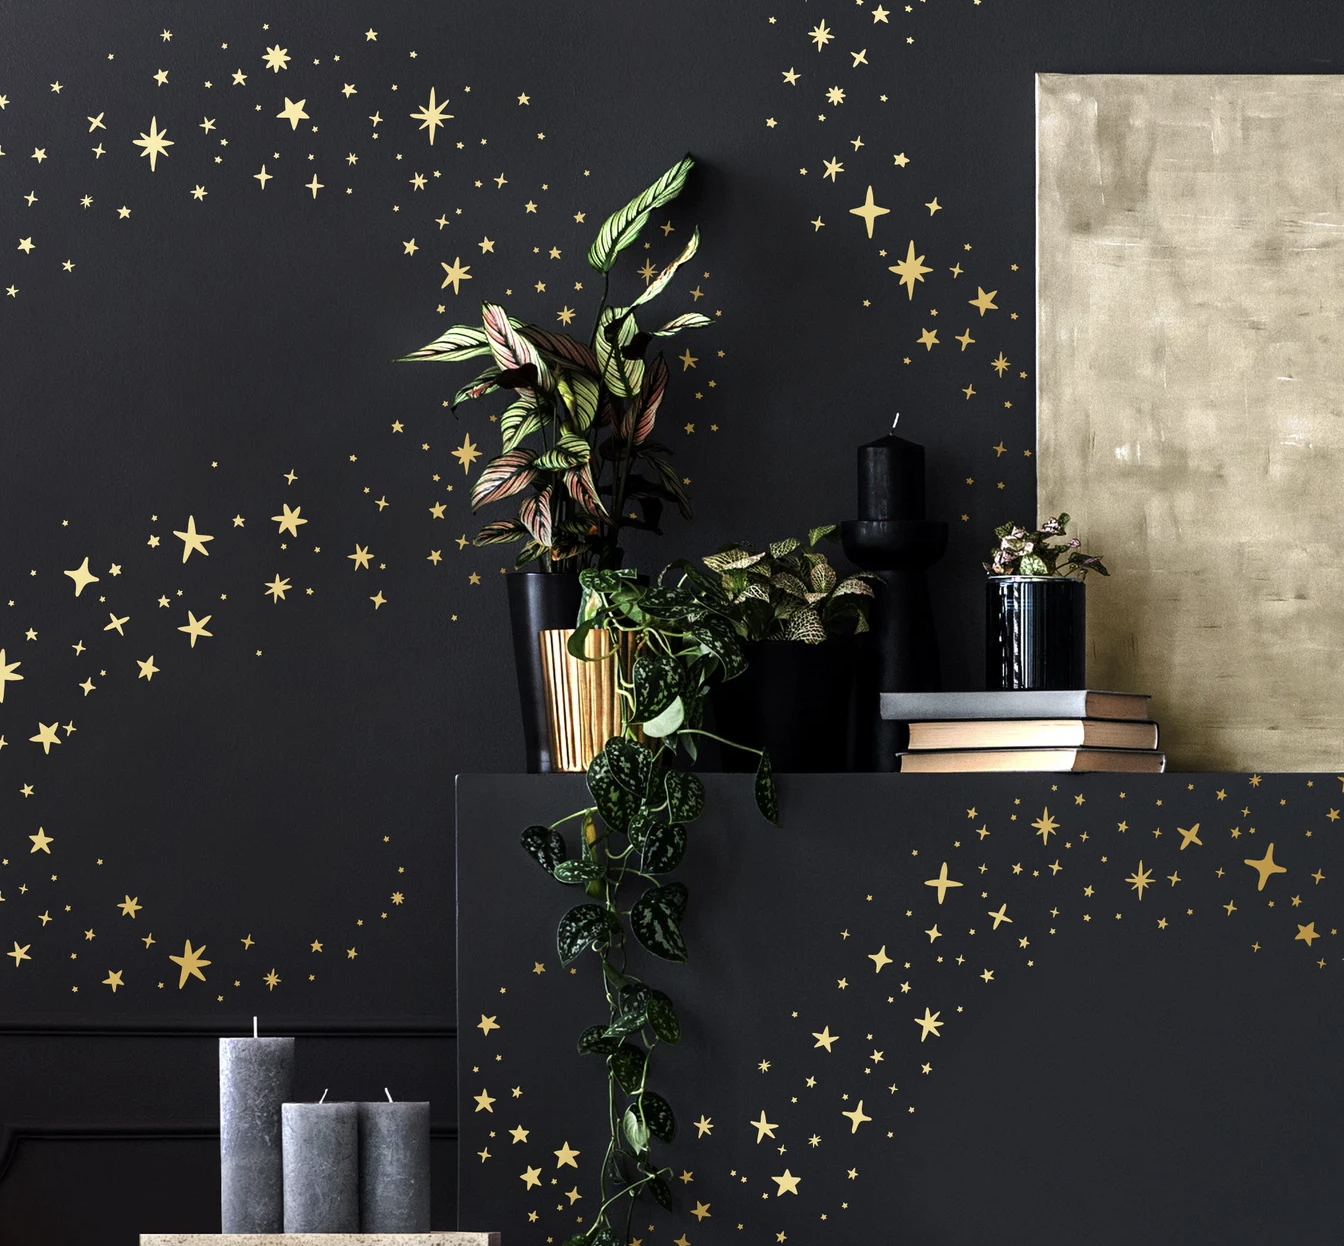
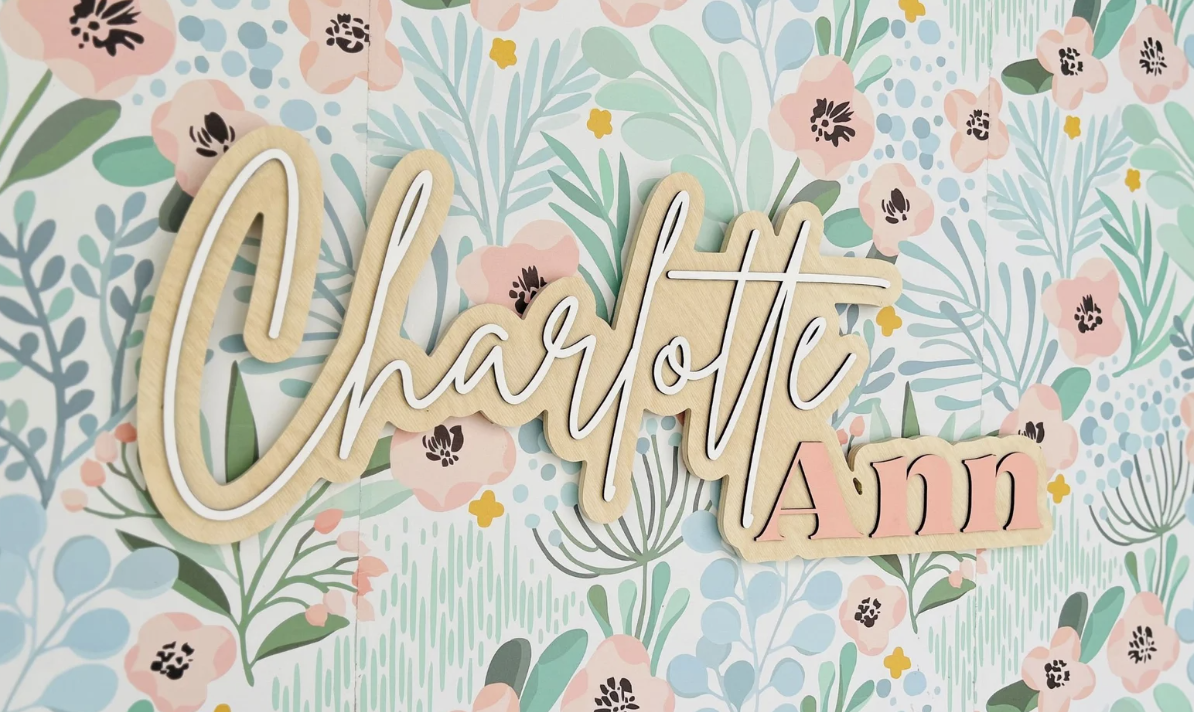
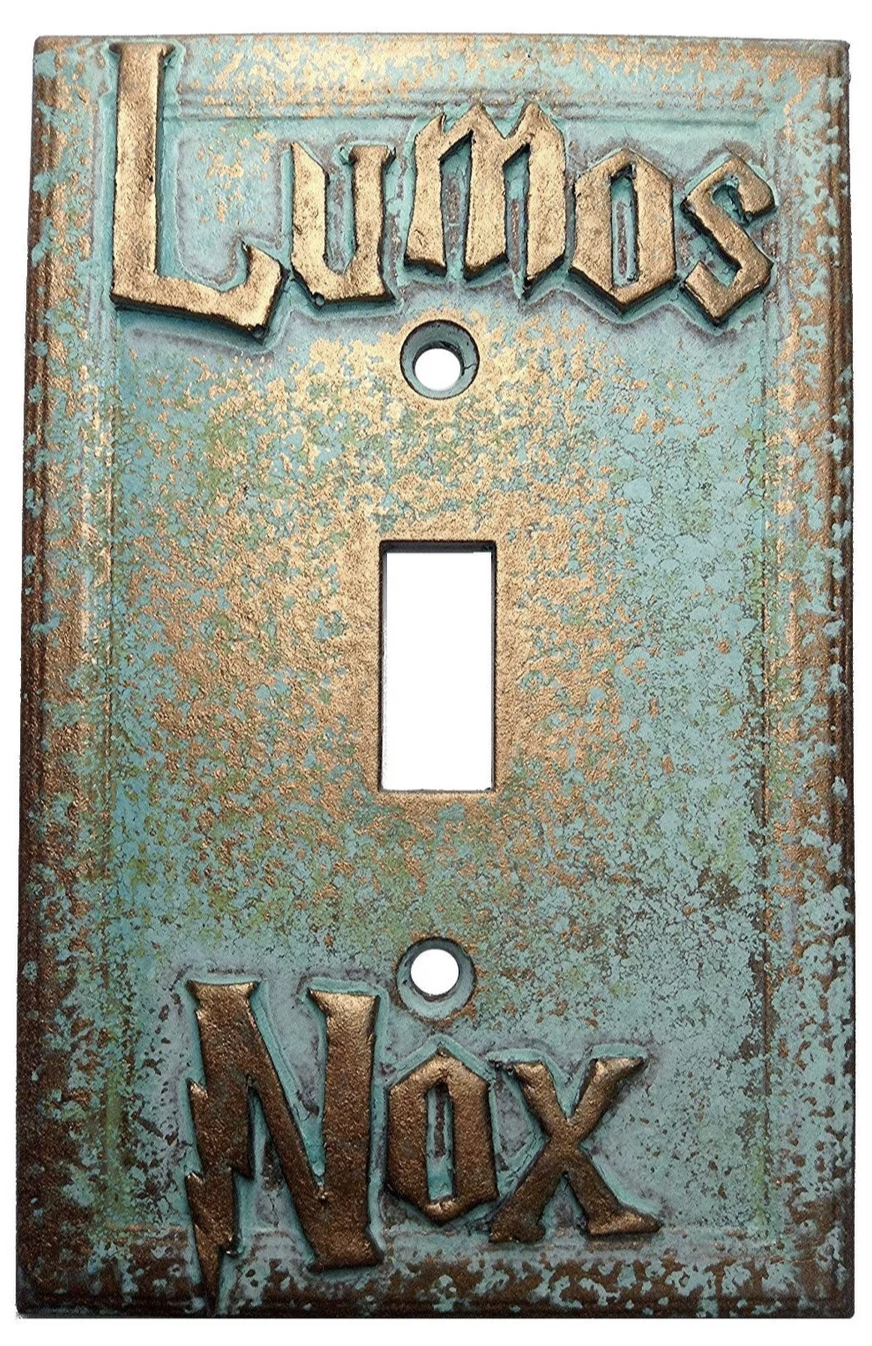
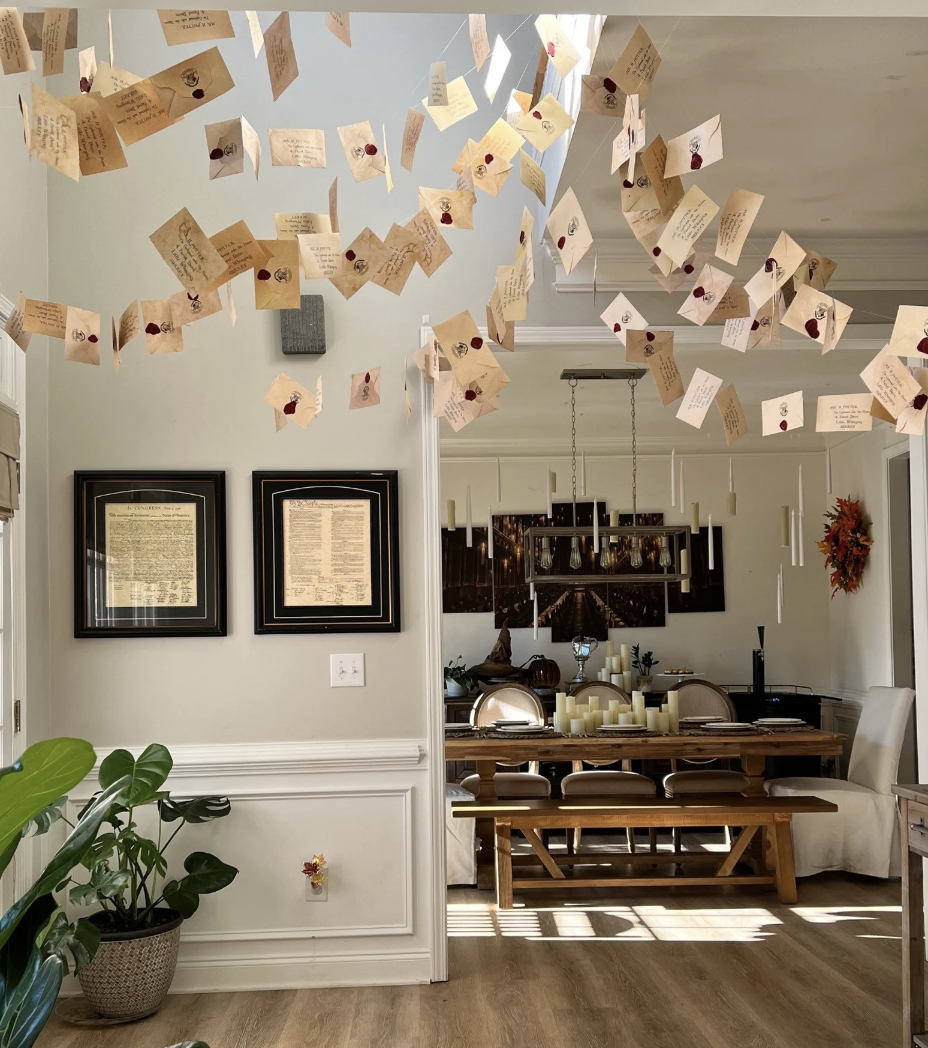
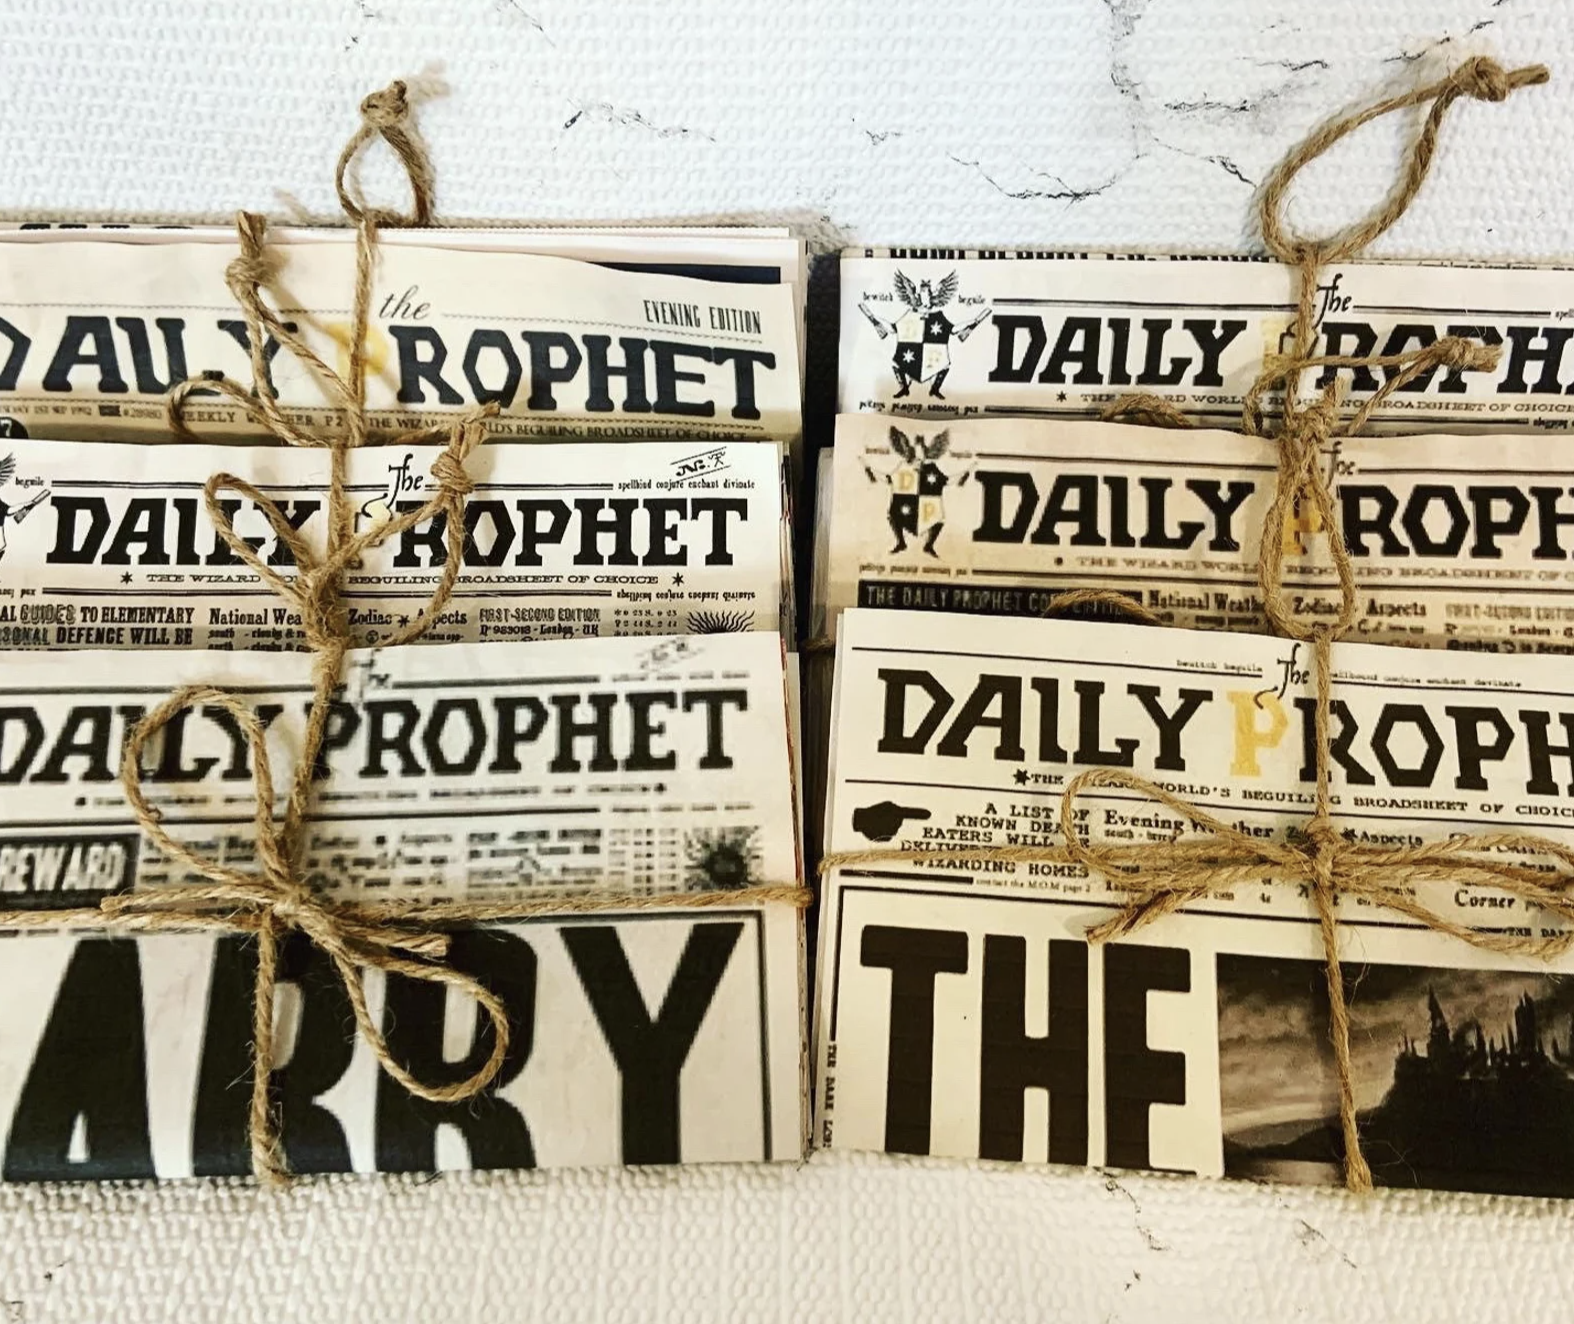
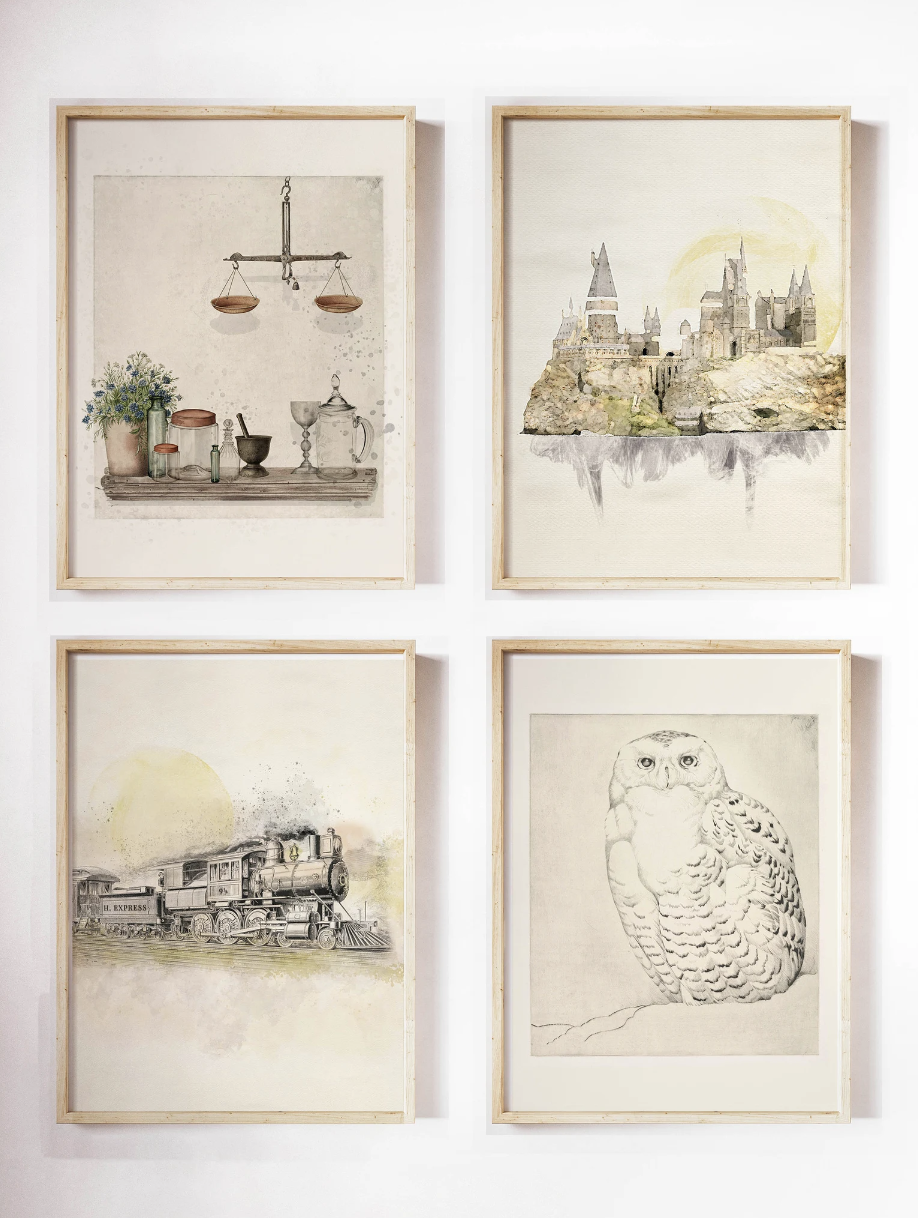
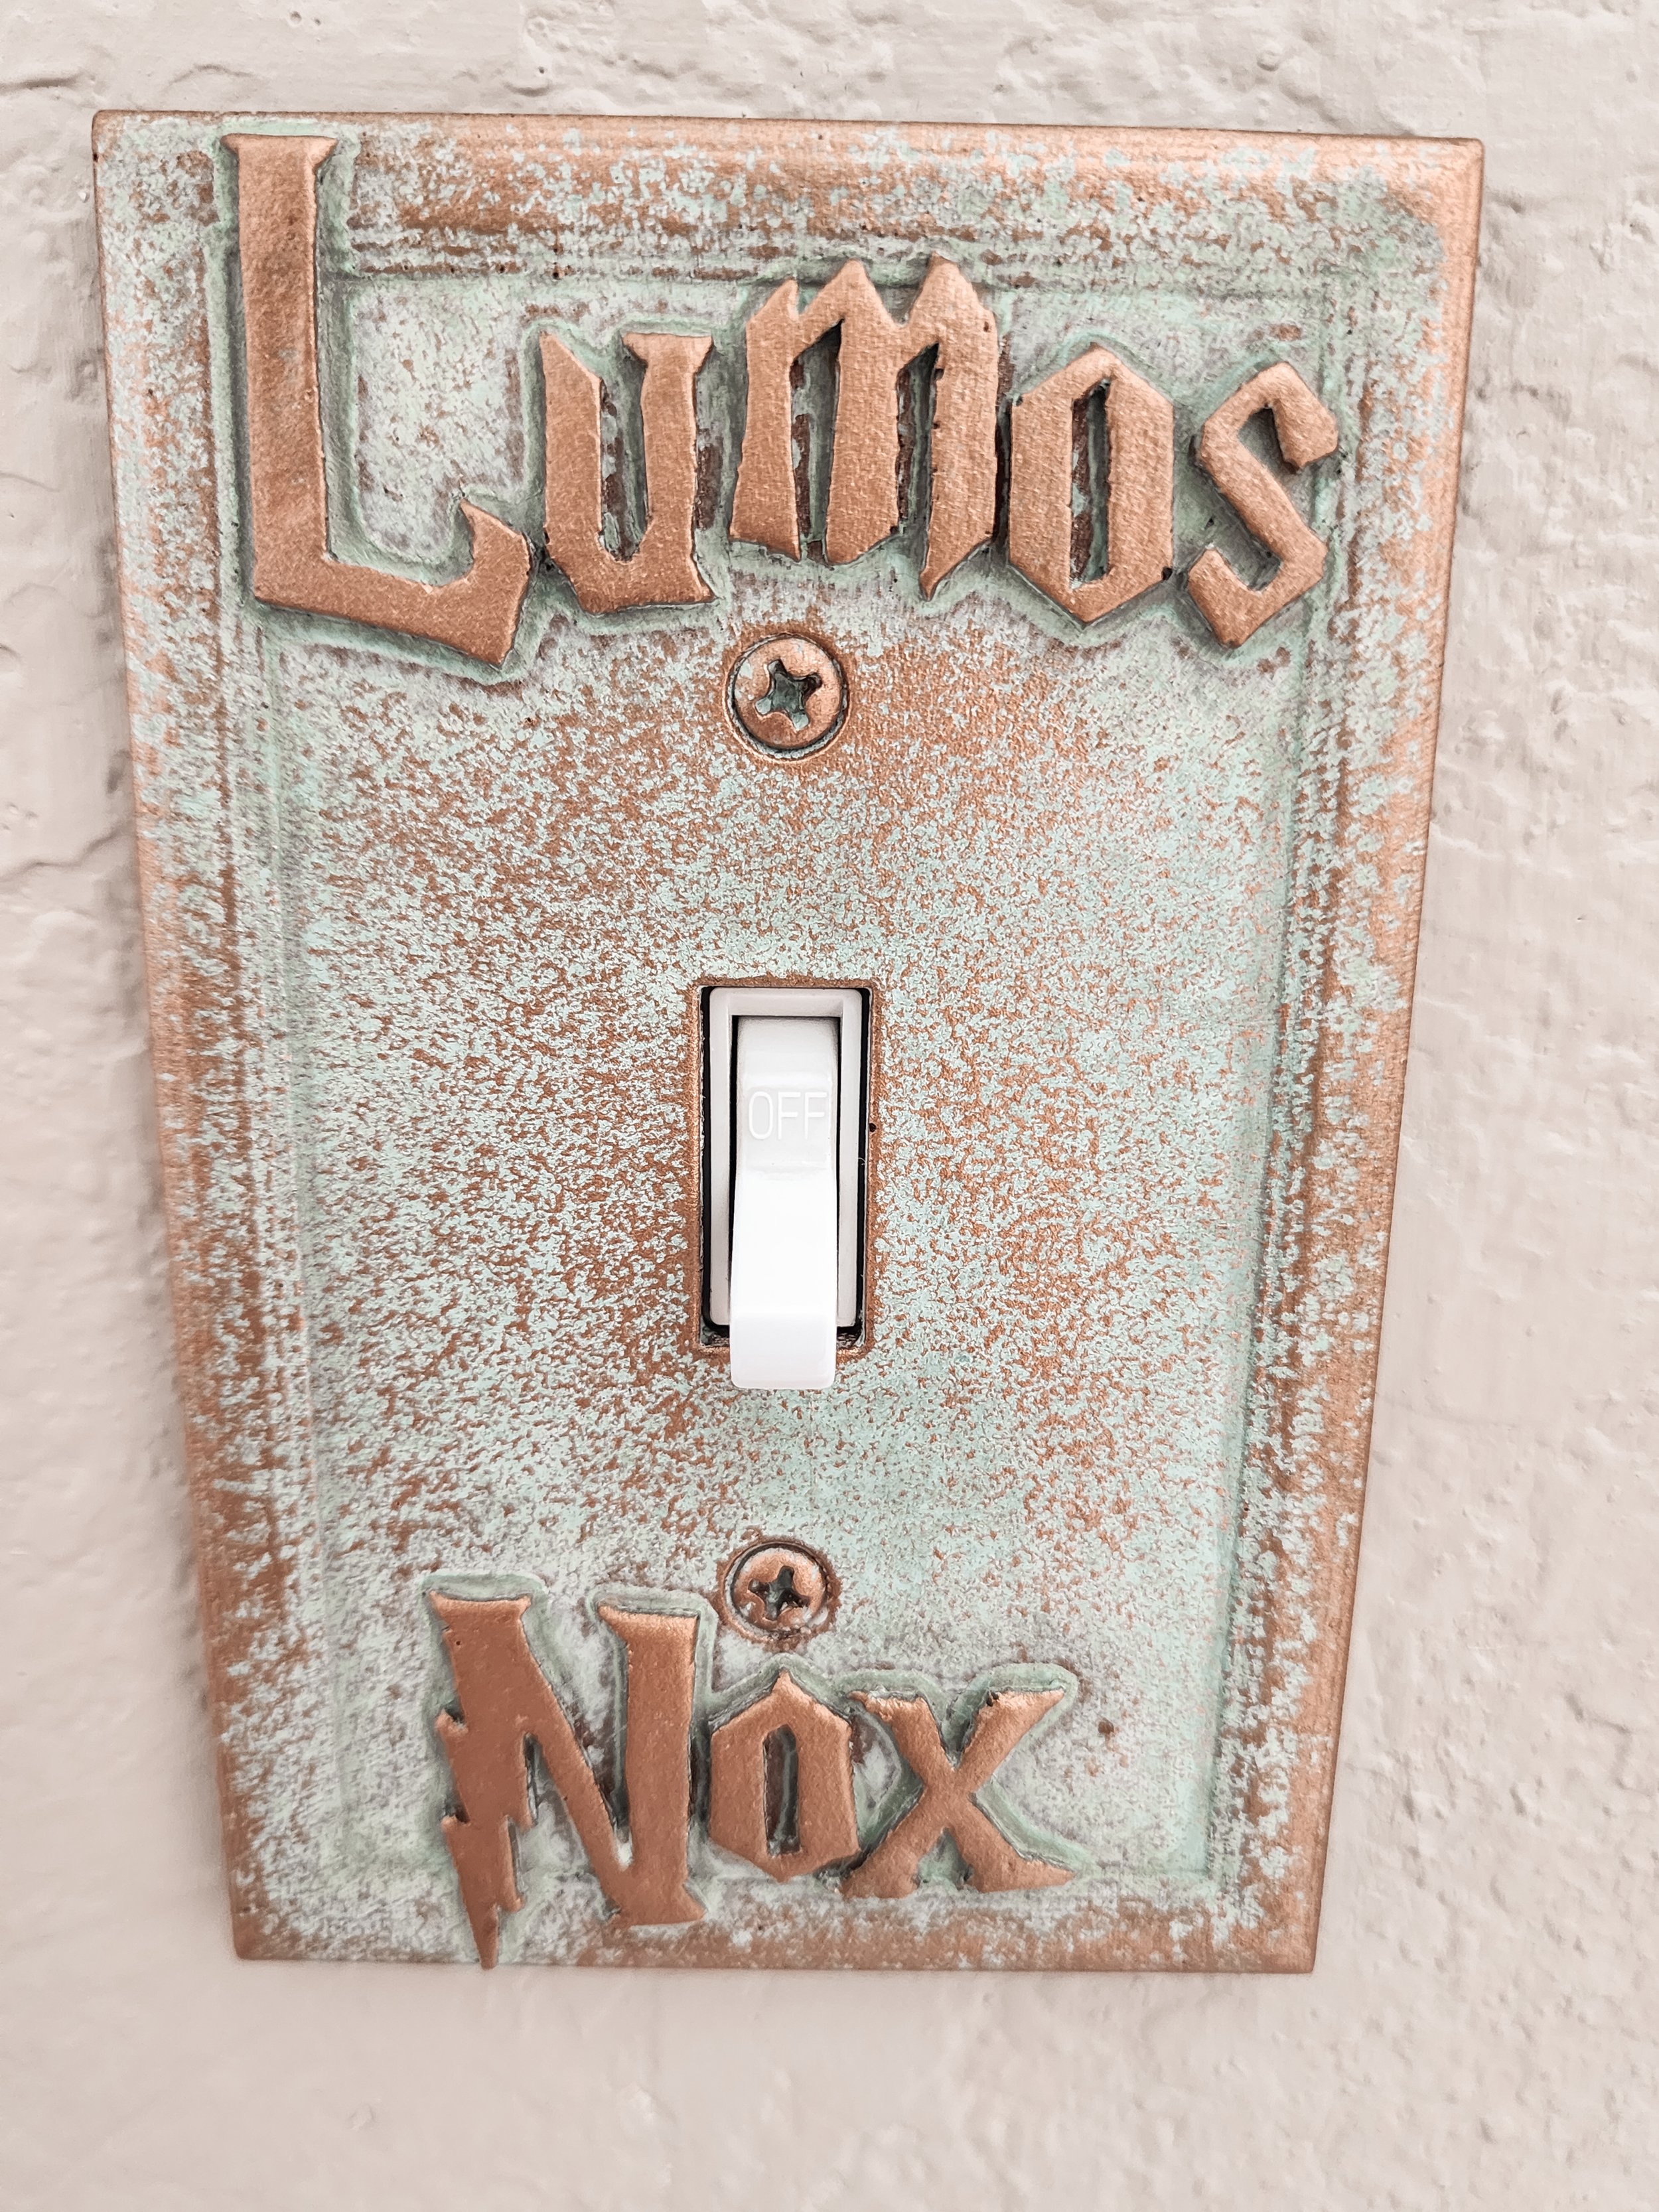
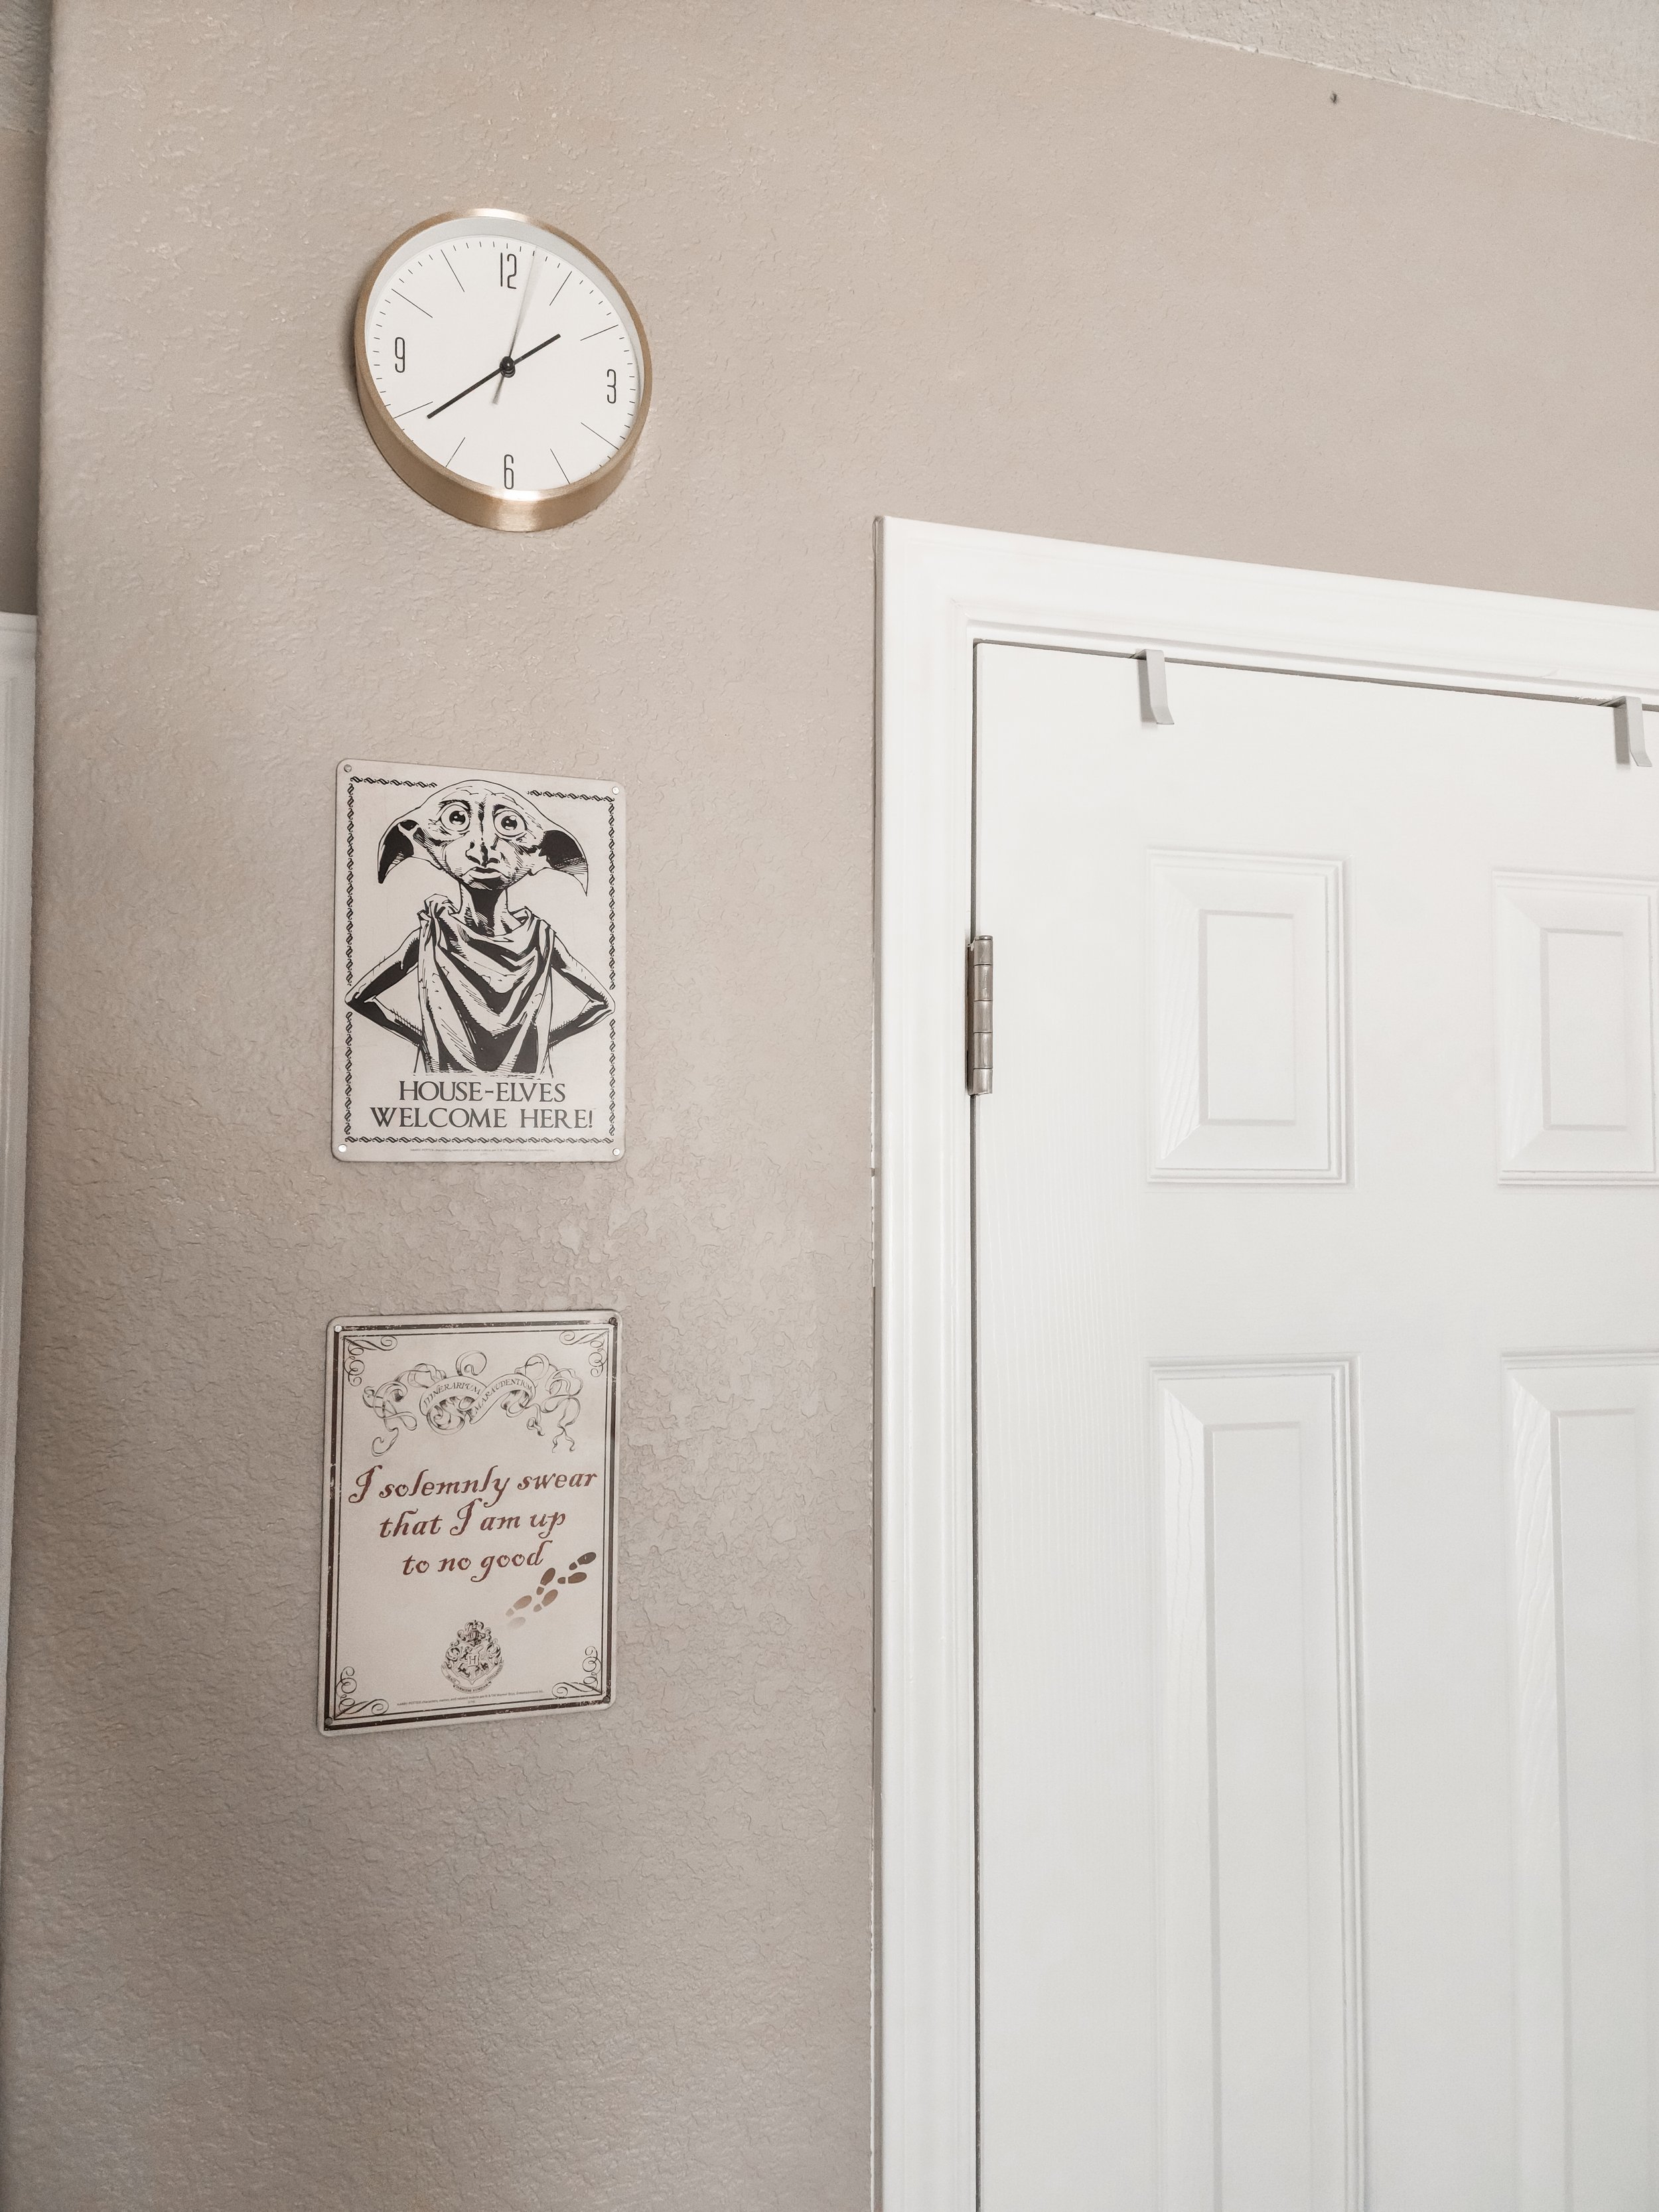
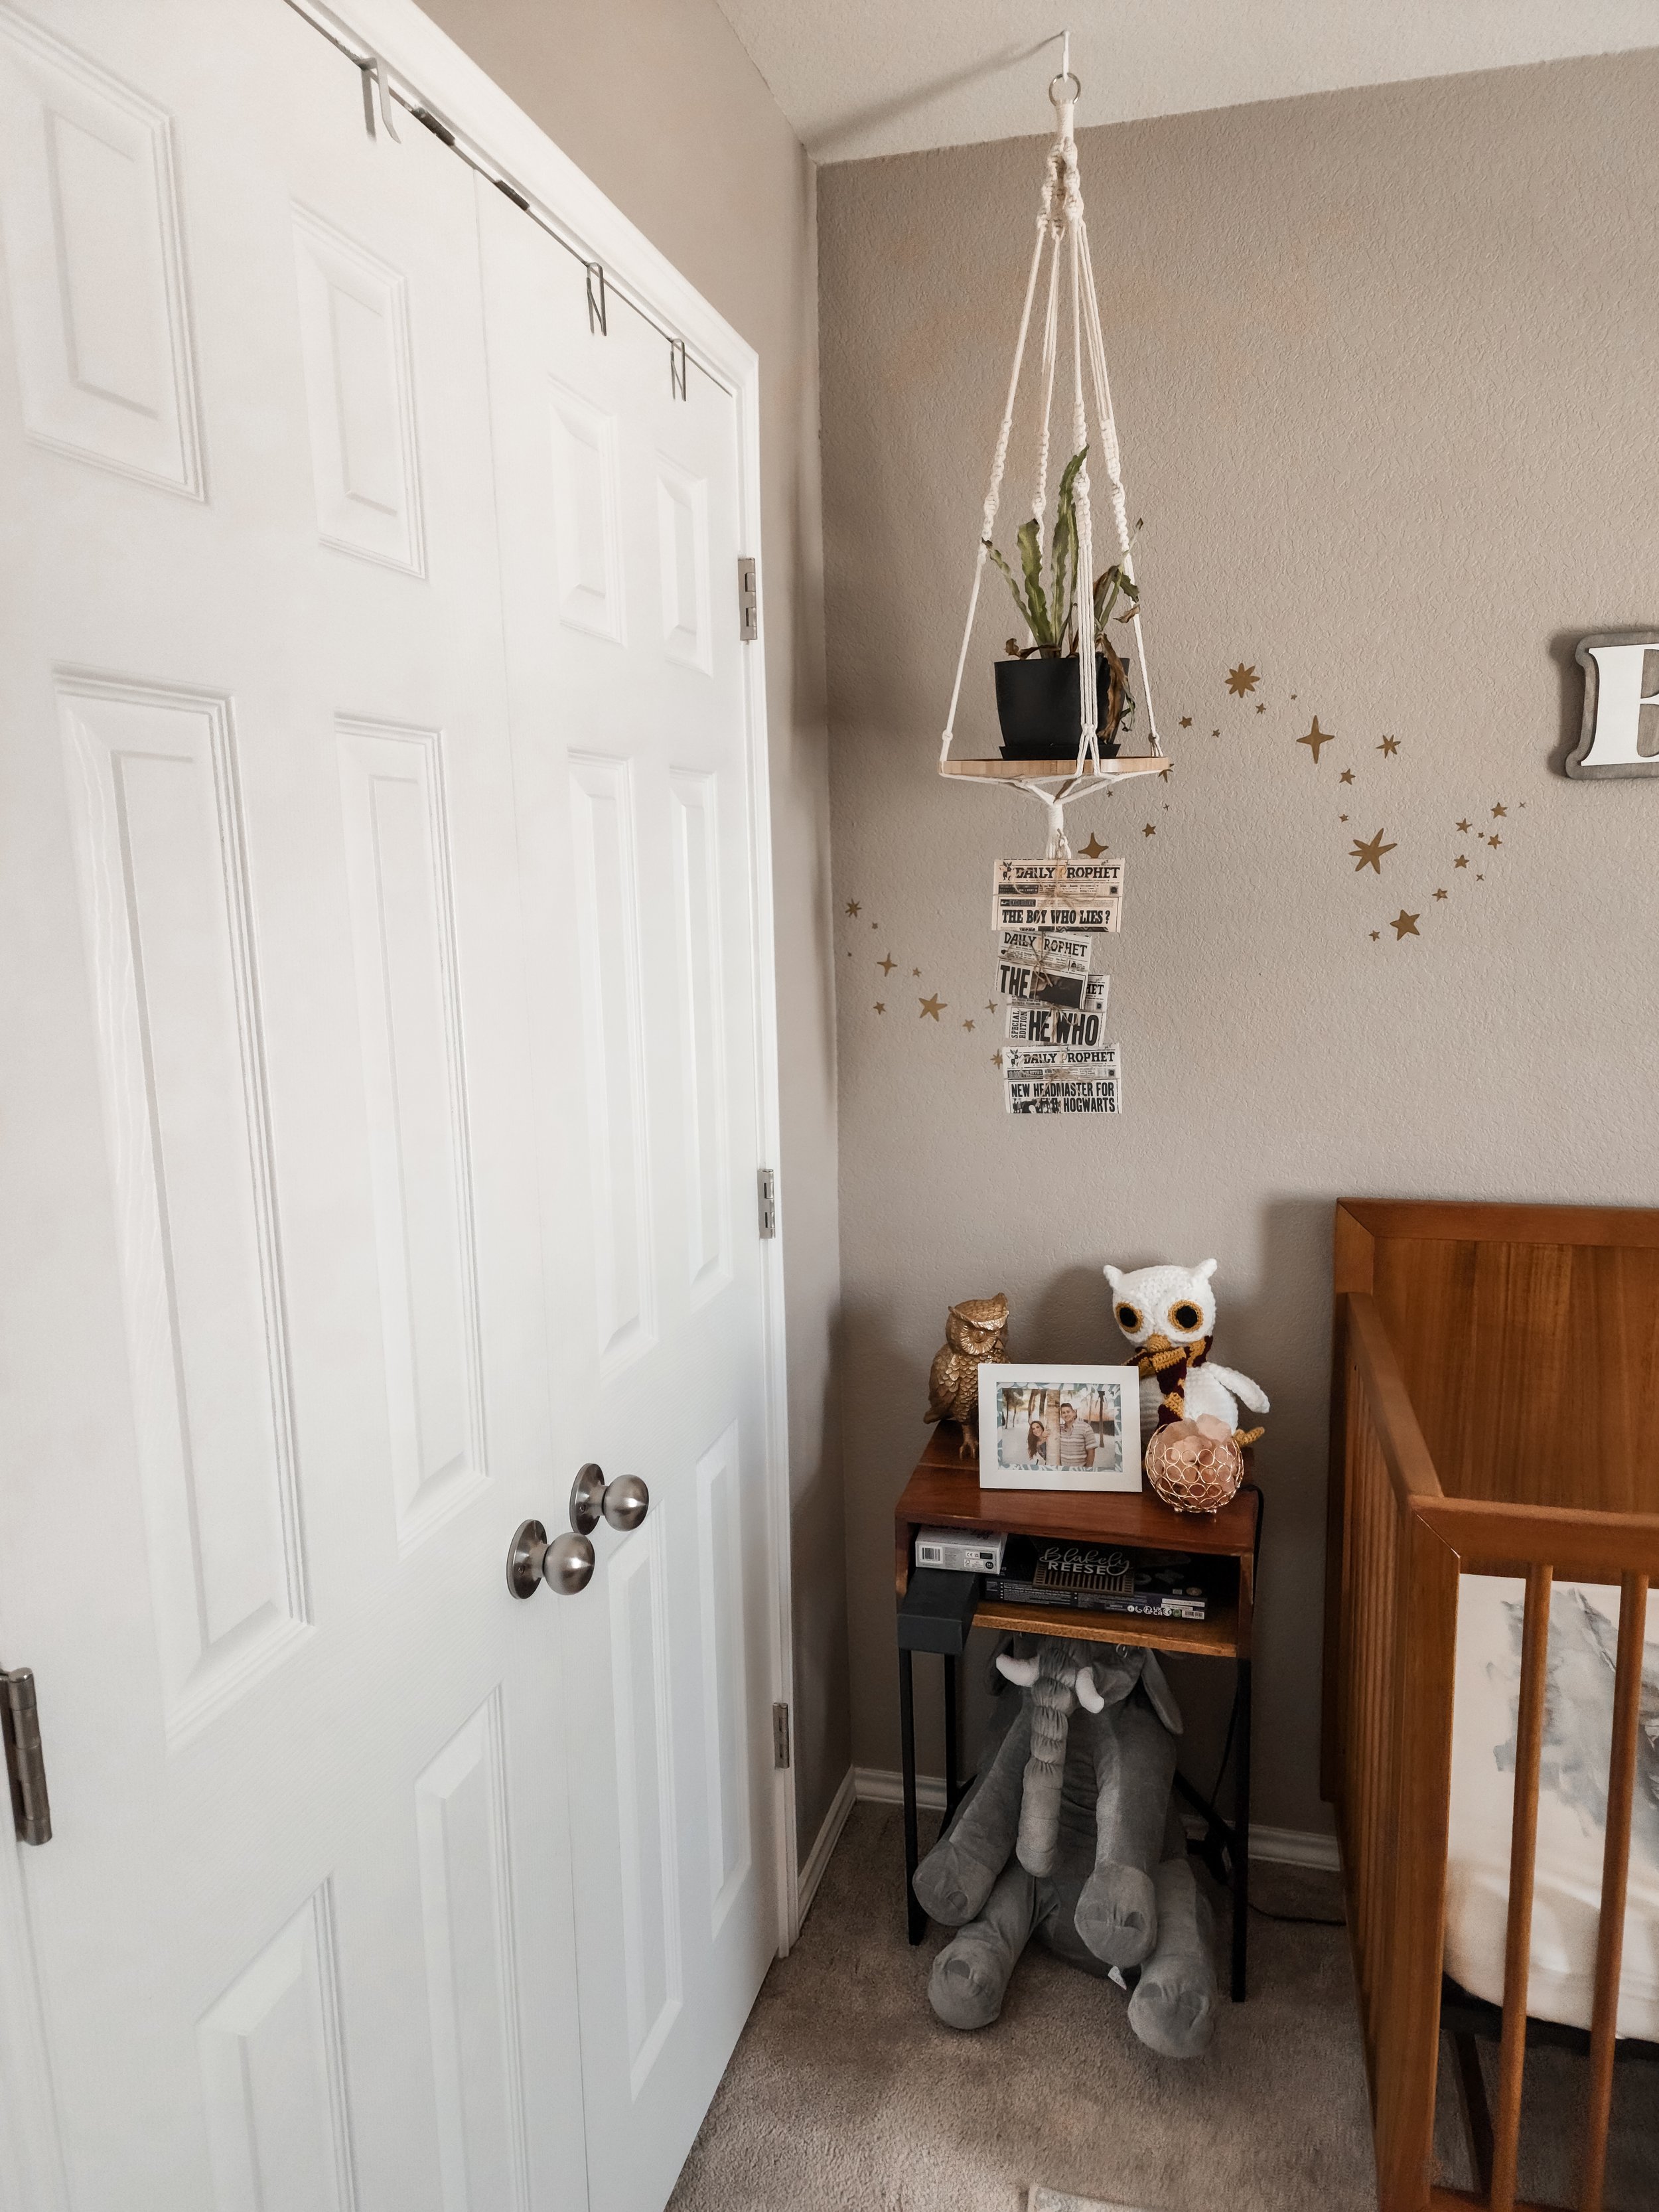
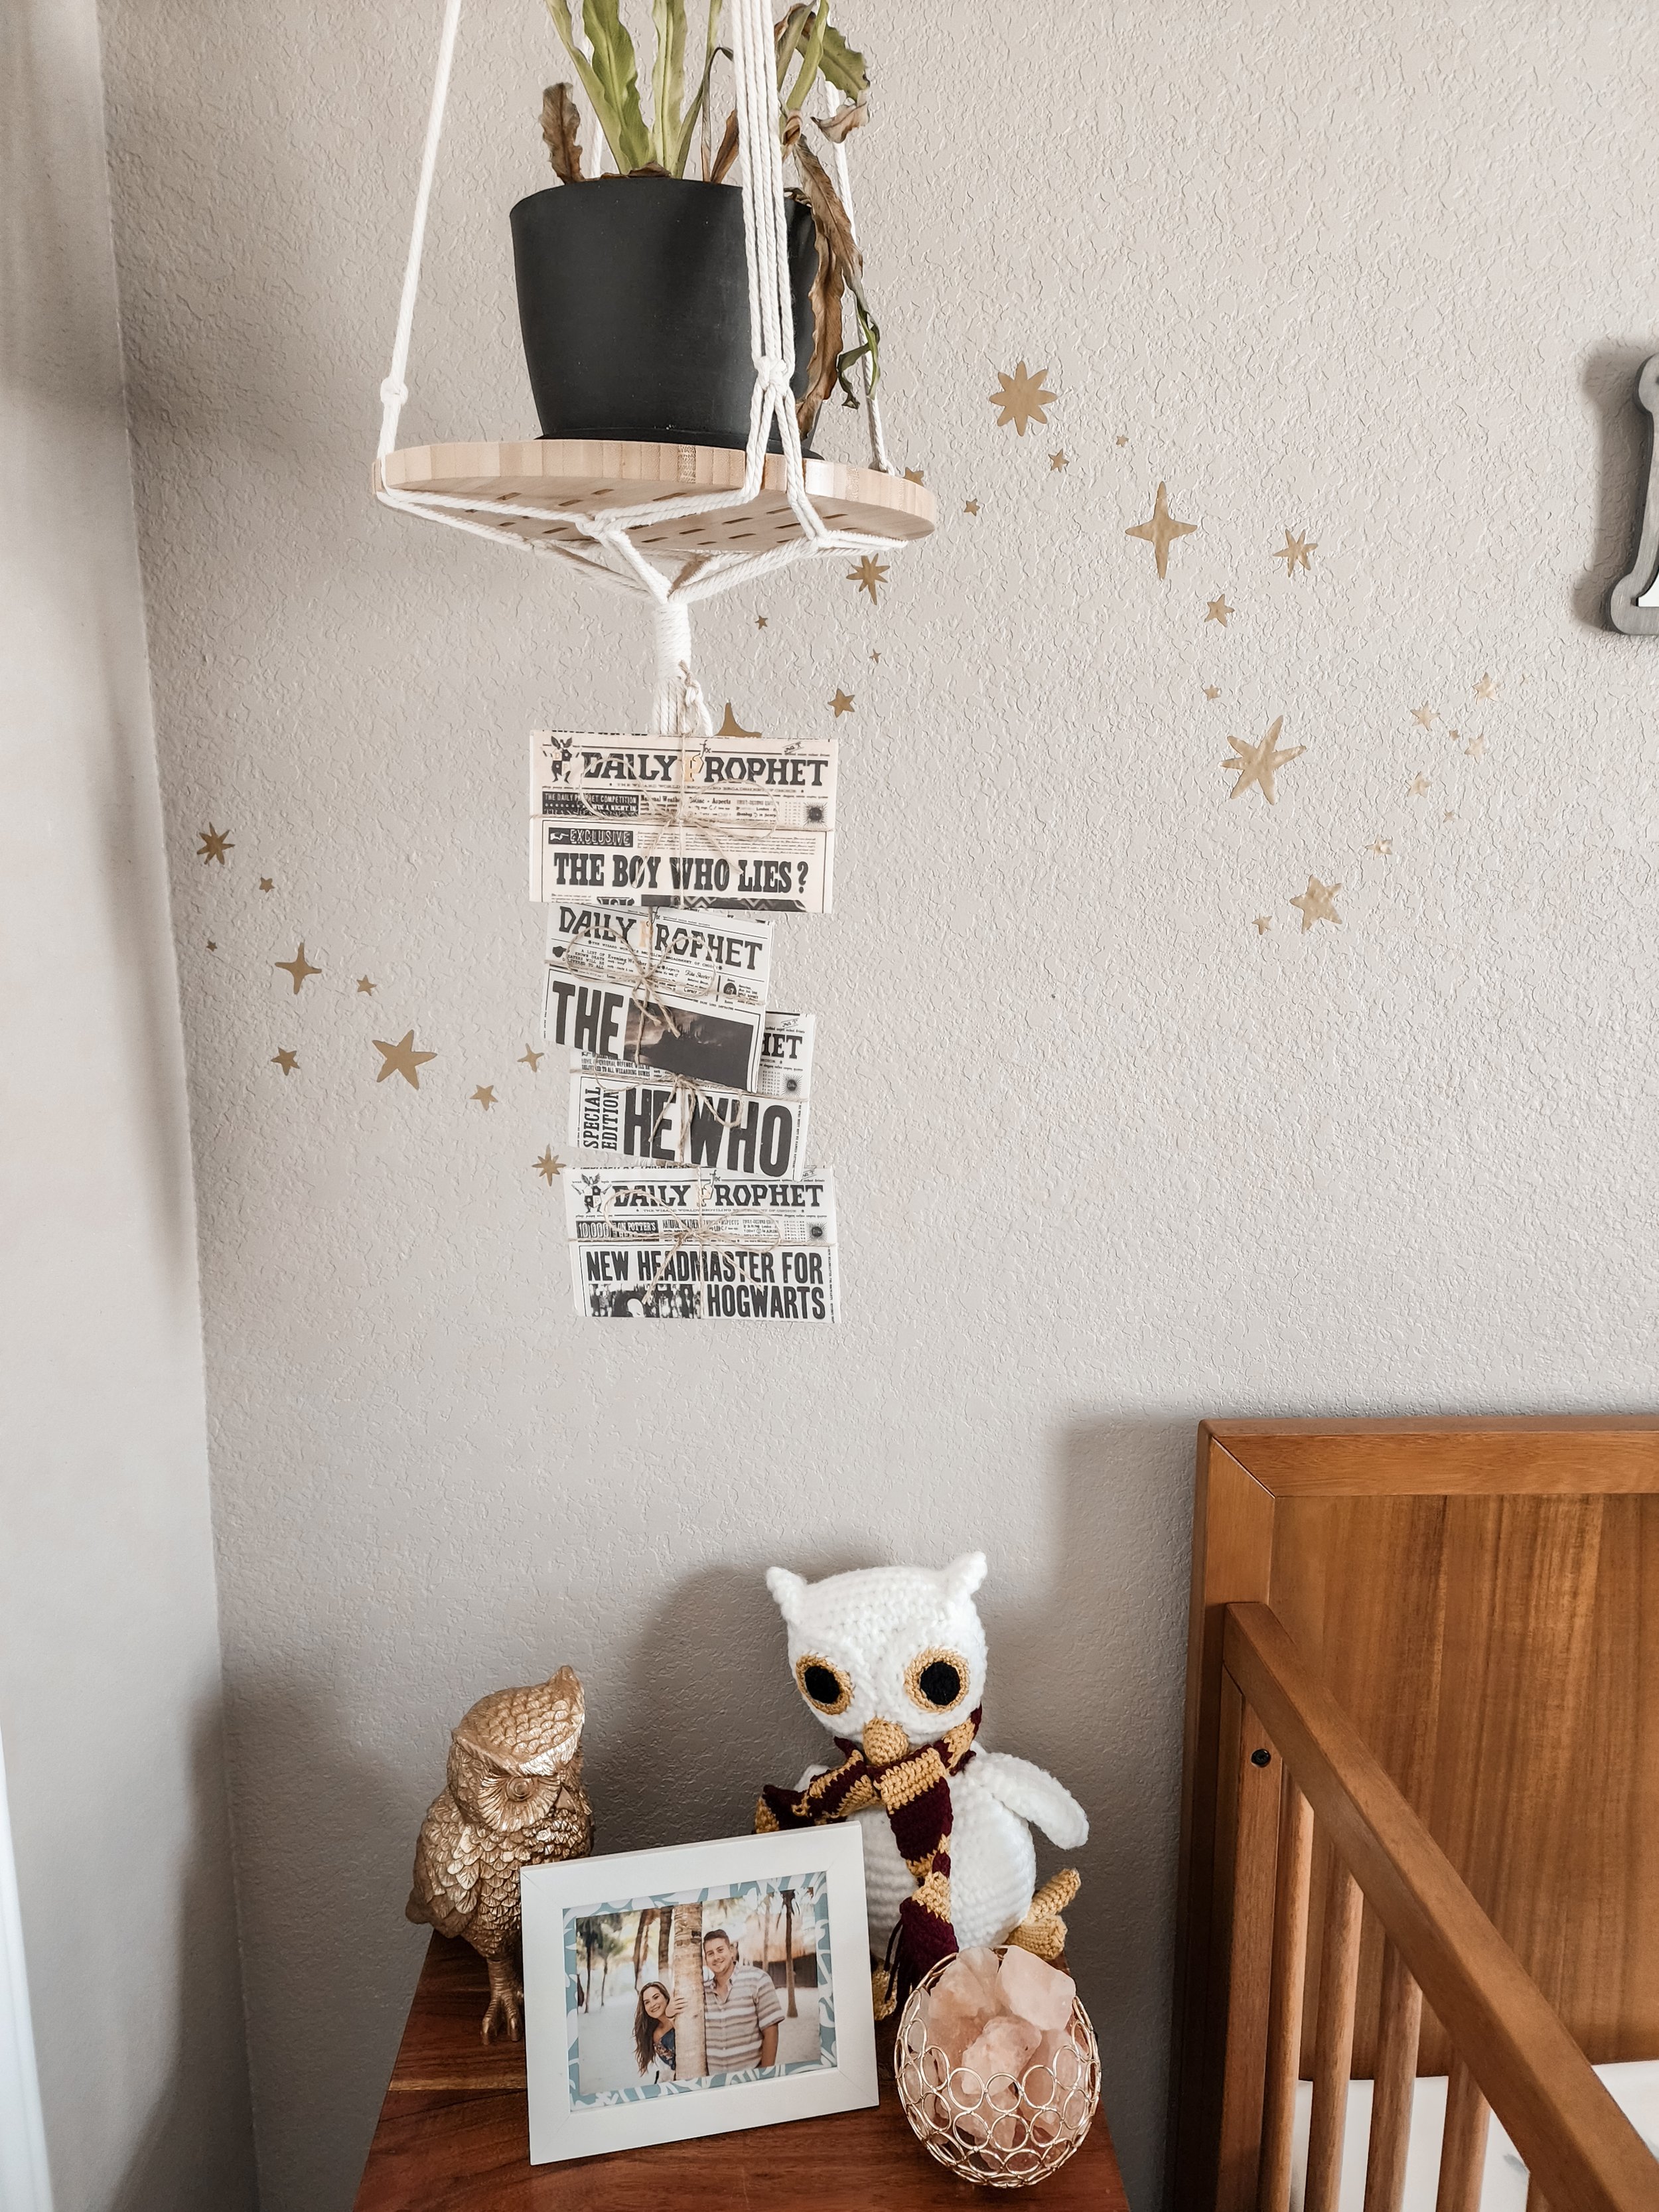
For a lot of the decor, we used Etsy. The light switch plates, star decals, name sign, prints above the changing table, “floating” Hogwarts letters and mini Daily Prophets all came from small shops found while browsing Etsy. Some of the only licensed decor we have are the metal signs under the clock — and I can’t link those because I purchased them years ago in the London Heathrow airport.
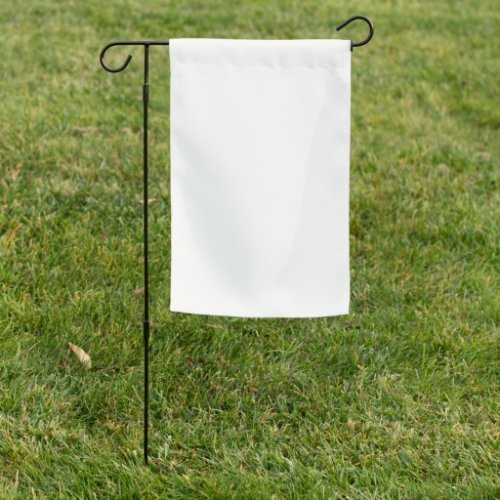
The house banners came to me one day when I was trying to think of something other than more framed prints to add in those spaces on either side of the room’s window. Again, I didn’t want it to be over the top HP — so I took my idea to Canva and made simple designs with elements I found there and dialed down the color palette from bold primary colors to soft pastels that echoed the signature house colors. Then, I exported the designs and had them printed on garden flags from Zazzle. The “rope” holding them is actually something that is used to tie garland to a banister that I just happened to find while walking the aisles at Michael’s.
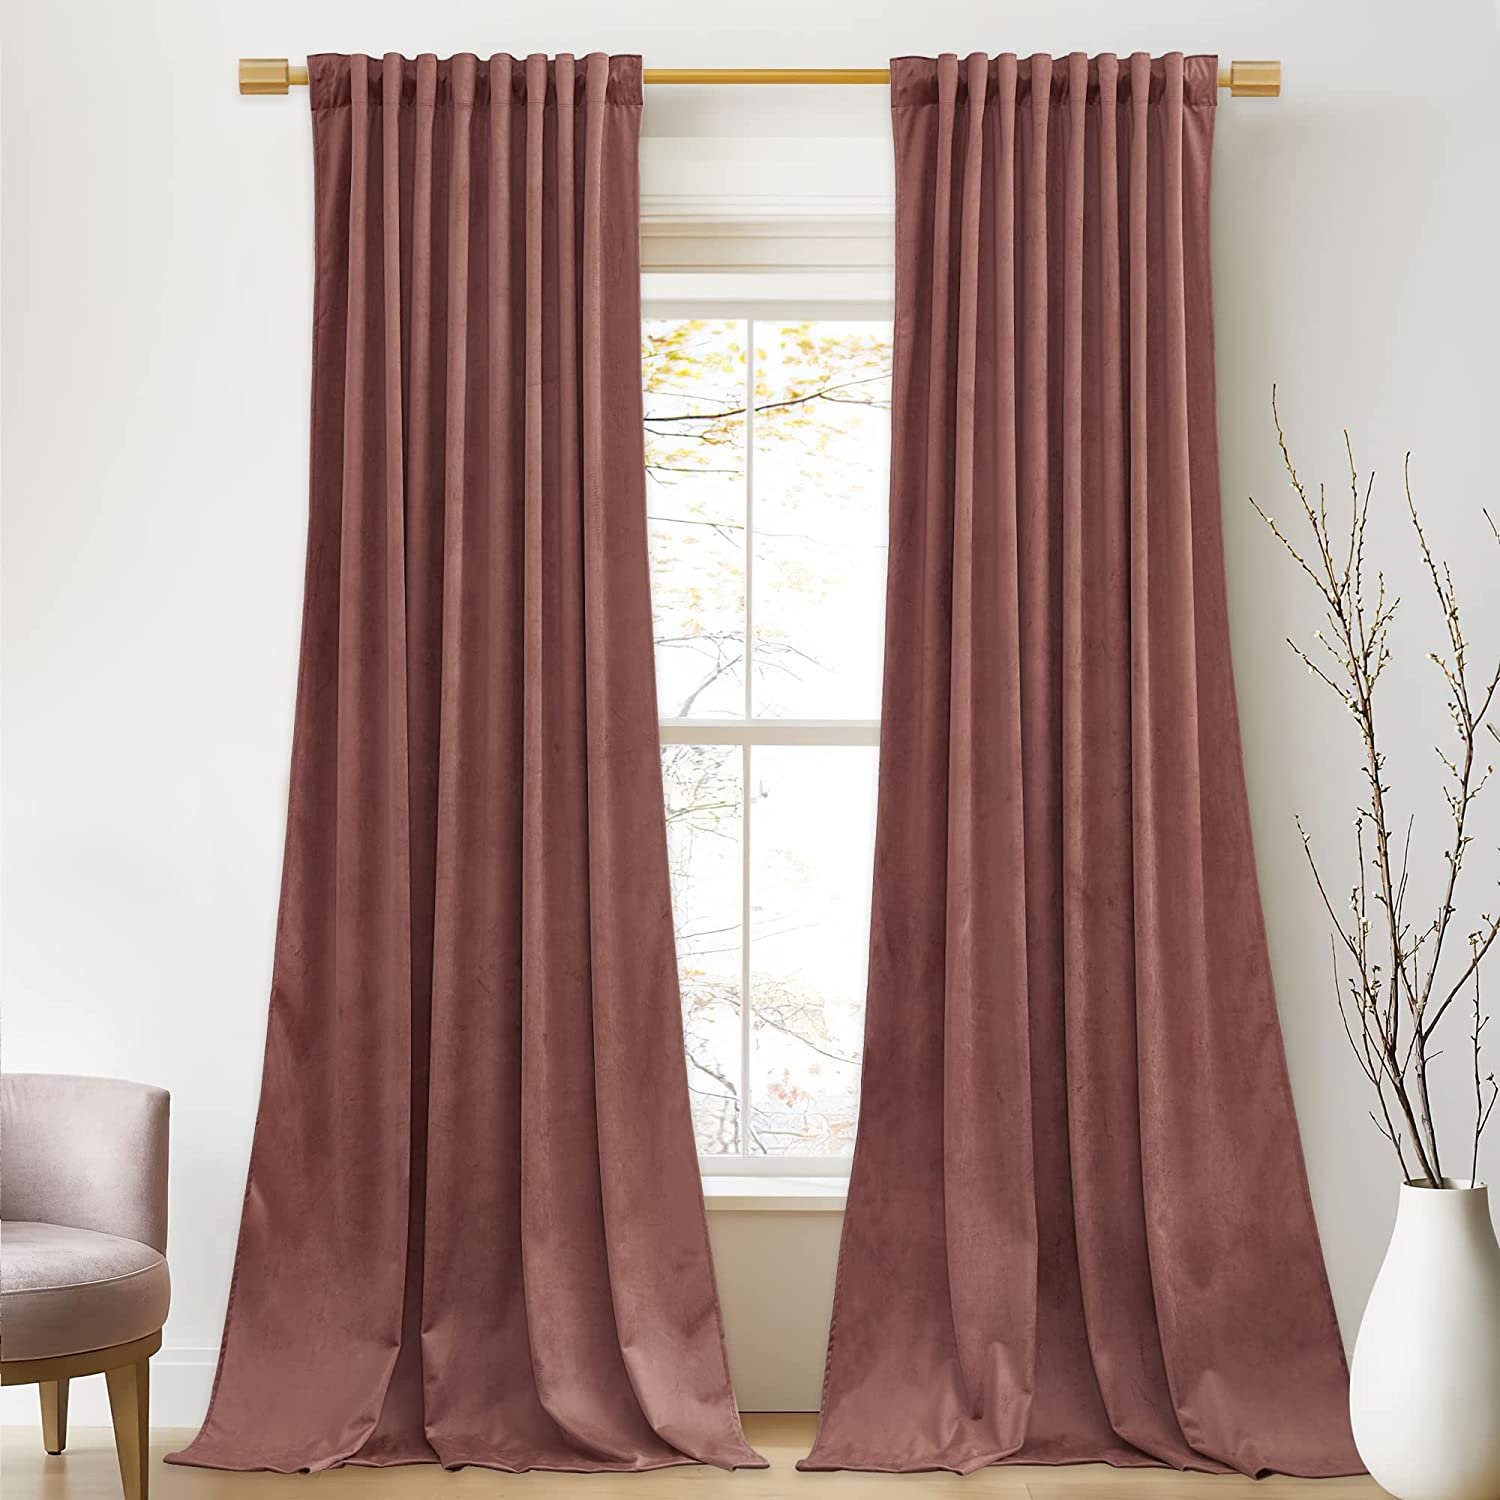
The curtains are from Amazon and the tie backs are the same “rope” I used to hang the banners. They have wire in the middle, so it allows them to be bent and hold the curtains in place.

Let me know what you think! Kyle & I had a lot of fun putting the room together, and while she’s not using it yet, we know we will have lots of fun memories in the months ahead. If you have any questions, leave a comment or send me a message on Instagram and I’ll do my best to answer back.

PAINT COLOR: BEHR NIGHTINGALE GRAY
SHOP THIS POST: